Kia Cee'd: Lighting System / Rear Combination Lamp Repair procedures
Kia Cee'd JD Service Manual / Body Electrical System / Lighting System / Rear Combination Lamp Repair procedures
| Removal |
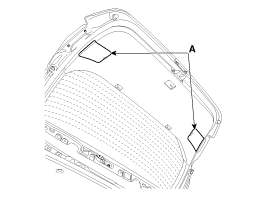
[5Door]
| Rear Combination lamp (Inside) |
| 1. |
Disconnect the negative (-) battery terminal.
|
| 2. |
Remove the rear combination lamp cover (A).
|
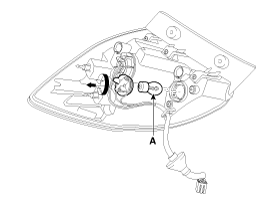
| 3. |
Remove the mounting nuts (4EA) and disconnect the connector (A)..
|
| 4. |
Remove the rear combination lamp (A).
|
| 5. |
Remove the tail lamp (A).
|
Rear Combination Lamp (Outside)
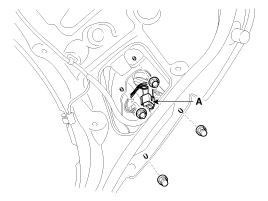
| 1. |
Disconnect the negative (-) battery terminal.
|
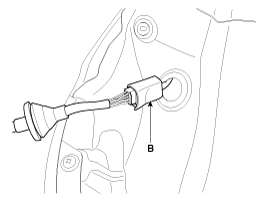
| 2. |
Remove the rear lamp assembly (A) after removing the bolts and connector
(B).
|

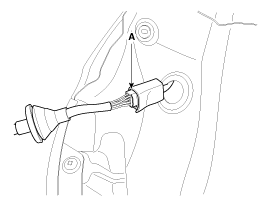
| 3. |
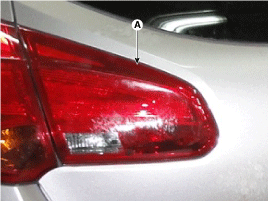
Replace turn signal lamp bulb (A) turning it the counterclockwise direction.
|
[3Door]
| 1. |
Disconnect the negative (-) battery terminal.
|
| 2. |
Remove the rear combination lamp assembly (A) after loosening the screws.
|
| 3. |
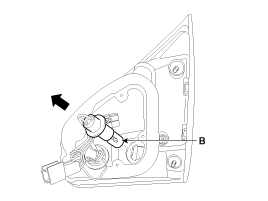
Disconnect the rear combination lamp connector (A).
|
| 4. |
Replace the turn signal lamp bulb (A) and stop lamp bulb (B) turning
it the counterclockwise direction.
|

| Installation |
| [5Door] |
| 1. |
Install the rear combination lamp (Inside) assembly.
|
| 2. |
Install the rear combination lamp (outside) assembly.
|
| 3. |
Connect the negative (-) battery terminal.
|
| [3Door] |
| 1. |
Install the rear combination lamp assembly.
|
| 2. |
Connect the negative (-) battery terminal.
|
 High Mounted stop lamp Repair procedures
Removal
1.
Disconnect the negative (-) battery terminal.
2.
Remove the rear spoiler assembly (A).
(Refer to Body - "Rear S ...
 Turn Signal Lamp Repair procedures
Removal
Door Mirror Turn Signal Lamp
1.
Disconnect the negative (-) battery terminal.
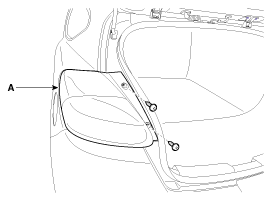
2.
Remove the mirror (A) from the mirror holde ...
Other information:
: AM/FM Radio
Tuning a Station
You can use the tune or seek controls on
the radio bezel to select a station.
To tune a station using the
touchscreen, select:
A pop up appears, allowing you to type in
the frequency of a station. You can only
enter a valid station for the source you are
currently listening to ...
Kia Cee'd JD Owners Manual: AUTO (Automatic) control
The rain sensor located on the upper end
of the windshield glass senses the
amount of rainfall and controls the wiping
cycle for the proper interval. The more it
rains, the faster the wiper operates.When
the rain stops, the wiper stops.
To vary the speed setting, turn the speed
contro ...
© 2017-2026 www.kceed.com
