Kia Cee'd: Windshield Wiper/Washer / Front Wiper Motor Repair procedures
Kia Cee'd JD Service Manual / Body Electrical System / Windshield Wiper/Washer / Front Wiper Motor Repair procedures
| Removal |
| 1. |
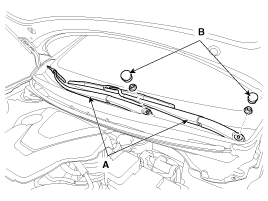
Remove the cap (B) and remove the nuts, then remove the wiper arm (A).
|
| 2. |
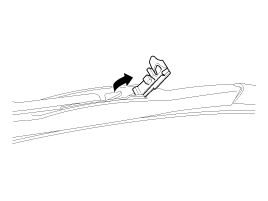
If necessary, release the wiper blade fixing clip by pulling up and
remove the wiper blade from the inside radius of wiper arm.
|
| 3. |
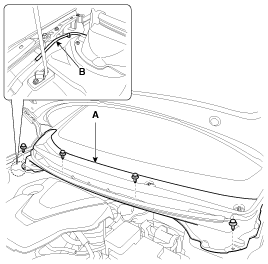
Remove the weather strip and the cowl top cover (A) after removing 4
rivets.
|
| 4. |
Disconnect the washer hose (B) connected to cowl top cover.
|
| 5. |
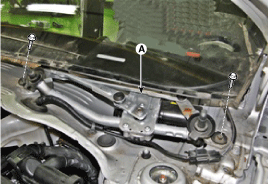
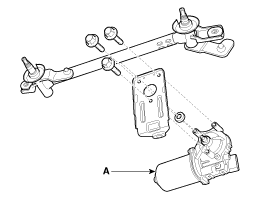
Remove the windshield wiper motor and linkage assembly (A) after removing
2 bolts.
|
| 6. |
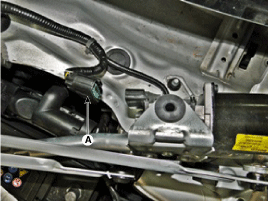
Disconnect the wiper motor connector (A) from the wiper motor & linkage
assembly.
|
| 7. |
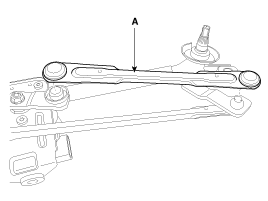
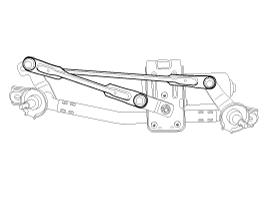
Hold the wiper motor crank arm and remove the upper linkage (A) from
the wiper motor crank arm.
|
| 8. |
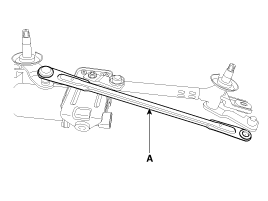
Remove the lower linkage (A) from the wiper motor crank arm.
|
| 9. |
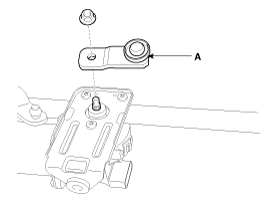
Hold the arm using the plyer, remove the crank arm (A) after loosening
the mounting nut.
|
| 10. |
Remove the wiper motor (A) with 3 bolts.
|
| Installation |
| 1. |
Install the wiper motor.
|
| 2. |
Install the crank arm.
|
| 3. |
Install the lower and upper linkage to the wiper motor crank arm.
|
| 4. |
Install the wiper motor and linkage assembly and then connect the wiper
motor connector.
|
| 5. |
Install the cowl top cover.
|
| 6. |
Install the windshield wiper arm and blade.
|
| 7. |
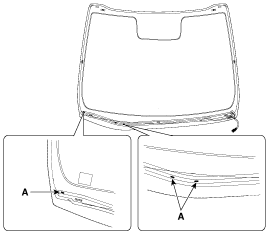
Install the wiper arm and blade to the auto stop position.
A : Auto stop position (Blade)
|
| Inspection |
Speed Operation Check
| 1. |
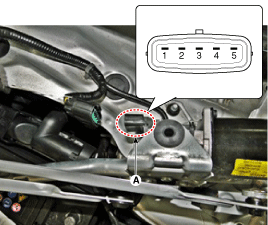
Remove the connector (A) from the wiper motor.
|
| 2. |
Attach the positive (+) lead from the battery to terminal 3 and the
negative (-) lead to terminal 1.
|
| 3. |
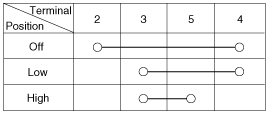
Check that the motor operates at low or high speed as below table.
|
 Front Wiper Motor Components and components location
Component Location
1. Cap
2. Nut
3. Wiper arm & blade
4. Rivet
5. Cowl top cover
6. Bolt
7. Wiper motor & linkage assembly
...
 Front Washer Motor Repair procedures
Inspection
Front and Rear Washer Motor
1.
With the washer motor connected to the reservoir tank, fill the reservoir
tank with water.
...
Other information:
Kia Cee'd JD Service Manual: Troubleshooting
Troubleshooting
Trouble Symptom
Probable cause
Remedy
Vehicle pulls to one side
Scoring of driveshaft ball joint
Replace
Wear, rattle or scoring of wheel bearing
Replace ...
Kia Cee'd JD Service Manual: Blind Spot Detection Unit" Repair procedures
Removal
1.
Disconnect the negative (-) battery terminal.
2.
Remove the rear bumper cover.
(Refer to Body - "Rear Bumper Cover")
3.
Remove the BSD unit (A) after loosening the mounting nu ...
© 2017-2025 www.kceed.com


