Kia Cee'd: Parking Brake System / Electronic Parking Brake (EPB) Repair procedures
Kia Cee'd JD Service Manual / Brake System / Parking Brake System / Electronic Parking Brake (EPB) Repair procedures
| Removal |
| 1. |
Turn ignition OFF and disconnect the negative (-) battery cable.
|
| 2. |
Remove the floor console assembly.
(Refer to Body - "Floor console assembly")
|
| 3. |
Disconnect the EPB control unit connector (A).
|
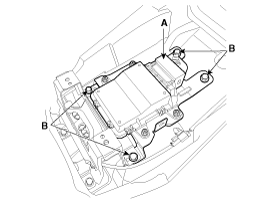
| 4. |
EPB control unit mounting nuts (B) and then remove EPB control unit.
|
| Installation |
| 1. |
Install in the reverse order of removal.
|
| 2. |
After replacing the EPB control unit with a new one, must be performed
the “Variant Coding” procedure.
(Refer to the “Variant coding”)
|
| 3. |
Perform the “G-Sensor Calibration” with GDS.
|
| 4. |
Check that the brake operates normally by pushing the EPB switch more
than 3 times after installing the EPB module.
|
| Variant coding |
| 1. |
Ignition "OFF", connect GDS.
|
| 2. |
Ignition "ON" & Engine "OFF" select vehicle name and EPB system.
|
| 3. |
Select EPB Variant coding mode.
|
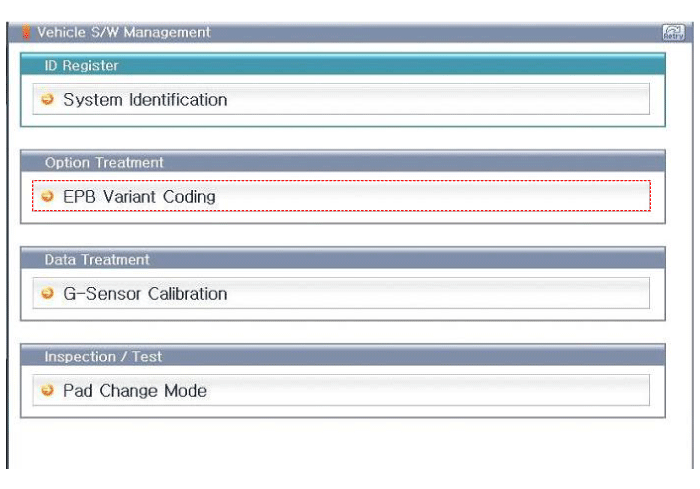
| 4. |
Perform the "EPB Variant Coding" procedure with GDS.
|
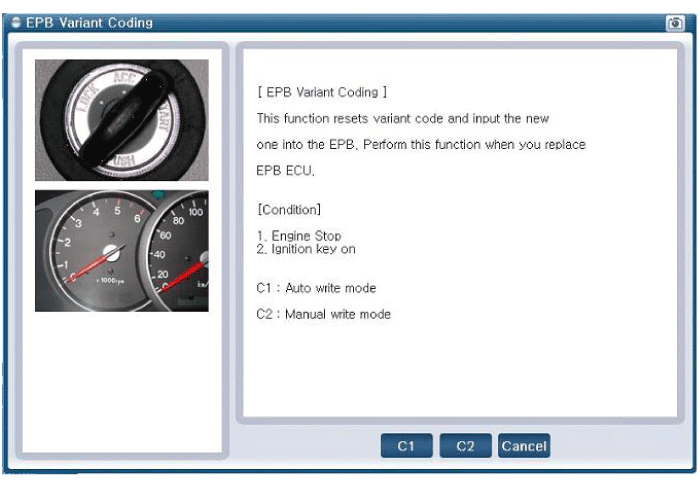
| 5. |
Complete the “Variant Coding” procedure.
|
 Electronic Parking Brake (EPB) Schematic diagrams
EPB Circuit Diagram (1)
EPB Circuit Diagram (2)
EPB connector input/output
Pin No.
Function
Pin No.
...
 EPB Switch Repair procedures
Remove
1.
Turn ignition OFF and disconnect the negative (-) battery cable.
2.
Remove the floor console upper cover.
(Refer t ...
Other information:
: Engine Block Heater
(If Equipped)
Engine Block Heater Precautions
WARNING: Failure to follow engine
block heater instructions could result in
property damage or serious personal
injury.
WARNING: Do not use your heater
with ungrounded electrical systems or
two-pronged adapters. There is a risk of
electrical shock. ...
Kia Cee'd JD Service Manual: Components and components location
Components (1)
[5Door]
1. Front bumper cover
Components (2)
[5Door]
1. Front bumper side bracket
[LH]
2. Front bumper side bracket [RH]
3. Front bumper upper bracket [LH]
...
© 2017-2026 www.kceed.com
