Kia Cee'd: Timing System / Timing Chain Repair procedures
| Removal |
| 1. |
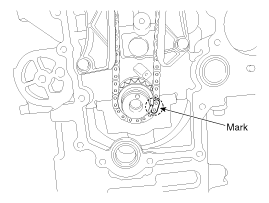
Turn the crankshaft pulley clockwise, and align its groove with the
timing mark of the timing chain cover.
|

| 2. |
Remove the timing chain cover.
(Refer to Timing System - "Timing Chain Cover")
|
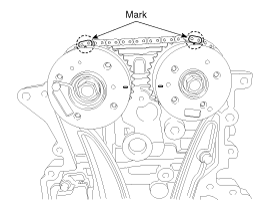
| 3. |
Align the timing marks of the CVVT sprockets with the upper surface
of the cylinder head to make No.1 cylinder be positioned at TDC.
|

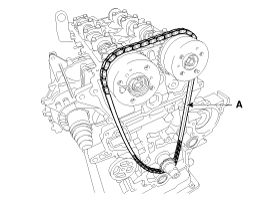
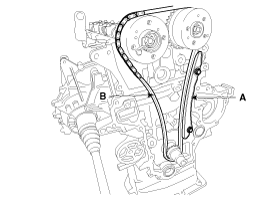
| 4. |
Remove the timing chain (A).
|
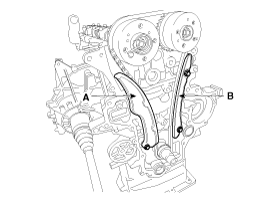
| 5. |
Remove the timing chain tensioner arm (A) and guide (B).
|
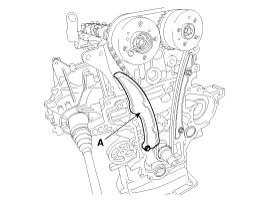
| 6. |
Remove the timing chain (A).
|
| Inspection |
| 1. |
Check the CVVT sprocket, crankshaft sprocket teeth for abnormal wear,
cracks or damage. Replace if necessary.
|
| 2. |
Check a contact surface of the chain tensioner arm and guide for abnormal
wear, cracks or damage.
Replace if necessary.
|
| 3. |
Check the hydraulic tensioner for its piston stroke and ratchet operation.
Replace if necessary.
|
| 4. |
Check the timing chain for its elongation, abnormal wear or damage.
Replace if necessary.
|
| Installation |
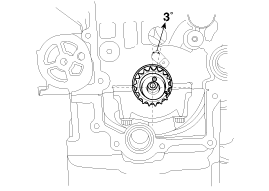
| 1. |
Dowel pin of crankshaft should be positioned at 3° in relation to vertical
center line.
|
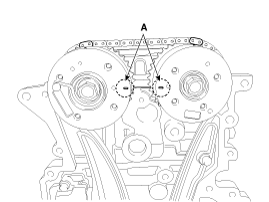
| 2. |
Align the TDC marks (A) of the CVVT sprockets with the upper surface
of the cylinder head to make No.1 cylinder be positioned at TDC.
|
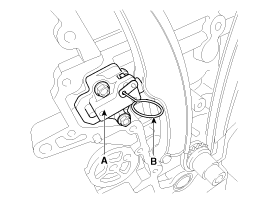
| 3. |
Install the new O-rings (A).
|
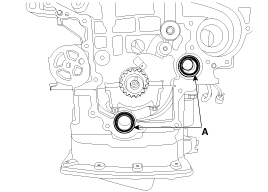
| 4. |
Install the timing chain guide (A) and the timing chain (B).
|

| 5. |
Install the chain tensioner arm (A).
|
| 6. |
Install the hydraulic tensioner (A) and remove the pin (B).
|
| 7. |
Install the timing chain cover.
|
 Timing Chain Components and components location
Components
1.
Timing chain
2. Timing chain guide
3.
Timing chain arm
4. Timing chain auto tensioner
...

Other information:
Kia Cee'd JD Owners Manual: To remove the cargo security screen
1. Push the guide pin inward.
2. While pushing the guide pin, pull out
the cargo security screen.
WARNING
Do not place objects on the cargo
security screen. Such objects
may be thrown about inside the
vehicle and possibly injure vehicle
occupants during an accident
or when b ...
Kia Cee'd JD Owners Manual: If you do decide to pull a trailer
Here are some important points if you decide to pull a trailer:
Consider using a sway control.You can ask a hitch dealer about sway
control.
Do not do any towing with your car during its first 2,000 km (1,200
miles) in order to allow the engine to properly break in. Failure
to heed th ...
