Kia Cee'd: Manual Transaxle System / Manual Transaxle Repair procedures
Kia Cee'd JD Service Manual / Manual Transaxle System / Manual Transaxle System / Manual Transaxle Repair procedures
| Removal |
| 1. |
Remove the air cleaner assembly.
(Refer to Engine Mechanical System - "Air Cleaner")
|
| 2. |
Remove the battery and battery tray.
(Refer to Engine Electrical System - "Battery")
|
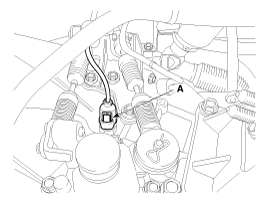
| 3. |
Disconnect the back up lamp switch (A).
|
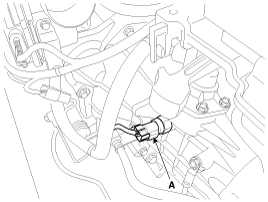
| 4. |
Disconnect the neutral switch connector (A).
|
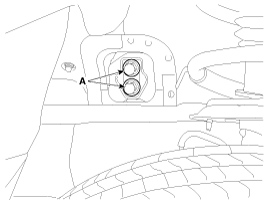
| 5. |
Remove the ground (A).
|

| 6. |
Remove the clutch tube bracket bolt (A).
|
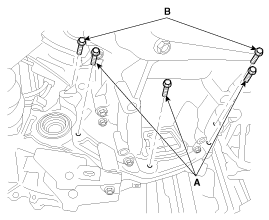
| 7. |
Remove the control cable.
|
| 8. |
Remove the transaxle upper mounting bolts (B) and the starter mounting
bolts (A).
|
| 9. |
Remove the cowl top cover.
(Refer to Body - "Cowl Top Cover")
|
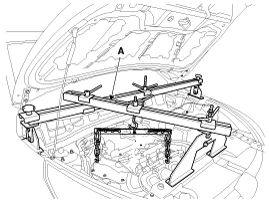
| 10. |
Install the engine support fixture (A).
(Refer to Special Service Tools-"Engine support fixture assembly drawing")
|
| 11. |
Remove the cover (A).
|
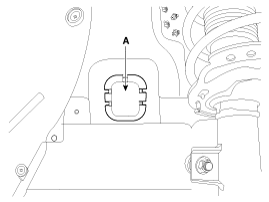
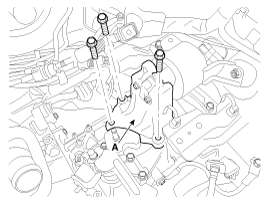
| 12. |
Remove the transaxle mounting bracket bolts (A).
|
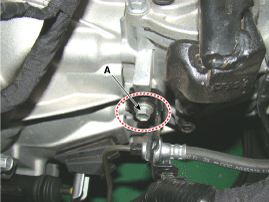
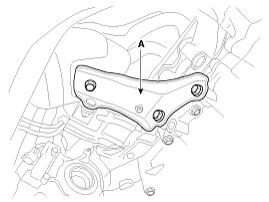
| 13. |
Remove the transaxle support bracket (A).
|
| 14. |
Remove the under cover.
(Refer to Engine Mechanical System - "Engine Room Under Cover")
|
| 15. |
Remove the driveshaft assembly.
(Refer to Driveshaft and axle - "Front Driveshaft")
|
| 16. |
Remove the bracket (A).
|

| 17. |
Remove the driveshaft heat protector (A).
|
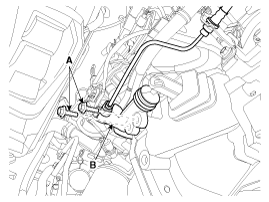
| 18. |
Remove the clutch release cylinder assembly (B) after removing the bolts
(A).
|
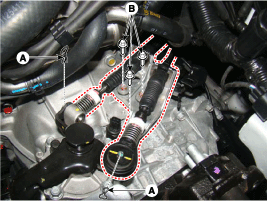
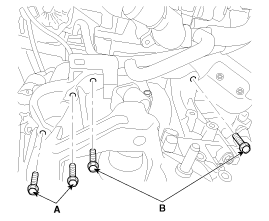
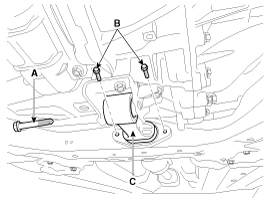
| 19. |
Remove the roll rod bracket (C) after removing bolts (A, B).
|
| 20. |
Remove the mounting bolts (A, B) after supporting the transaxle by a
jack.
|
| 21. |
Remove the transaxle while slowly lower the jack.
|
Be careful not to damage other system or parts near by when removing
the transaxle assembly.
|

| Installation |
Replace the oil seal with a new one by using special tool (09431-26100)
when oil leak occurred because of differential oil seal damage.
|
| 1. |
Install in the reverse order of removal.
|
 Manual Transaxle Components and components location
Components
1. Manual transaxle assembly
2. Manual transaxle support bracket
3. Clutch release bearing
4. Clutch release fork
5. Control cable brac ...
 Back-up Lamp Switch Specifications
Specifications
Item
Specified
Type
ON/OFF
Operation condition
Reverse gear
...
Other information:
: How Do the Front Airbags Work
The driver and front passenger airbags
deploy during significant frontal and near
frontal crashes.
The driver and passenger front airbag
system consists of:
Driver and passenger airbag modules.
Front passenger sensing system.
Crash sensors and monitoring system
with readiness indicator.
T ...
Kia Cee'd JD Owners Manual: Heated steering wheel
With the ignition switch in the ON position,
pressing the heated steering wheel
button warms the steering wheel.
✽ NOTICE
The heated steering wheel will turn off
automatically approximately 30 minutes
after the heated steering wheel is turned
on.
■ Normal vision
■ Super ...
© 2017-2026 www.kceed.com
