
Kia Cee'd: Driveshaft Assembly / Front Driveshaft Repair procedures
Kia Cee'd JD Service Manual / Driveshaft and axle / Driveshaft Assembly / Front Driveshaft Repair procedures
| Replacement |
| 1. |
Loosen the wheel nuts slightly.
Raise the vehicle, and make sure it is securely supported.
|
| 2. |
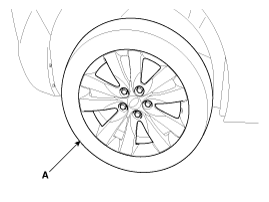
Remove the front wheel and tire (A) from front hub .
|

| 3. |
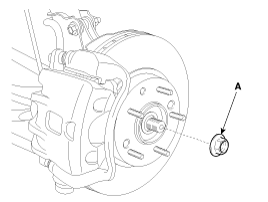
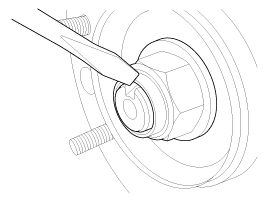
Remove the driveshaft coking nut (A).
|
| 4. |
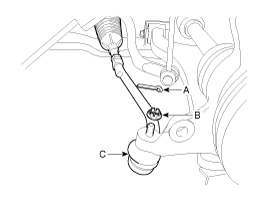
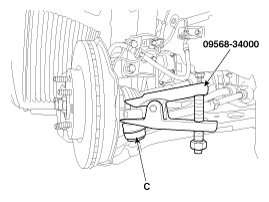
Remove the tie rod end ball joint (C) from the knuckle by using the
SST (09568-34000).
|
| 5. |
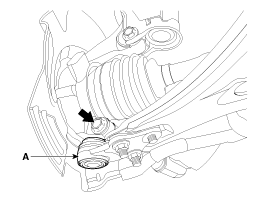
Remove the lower arm (A) from the knuckle.
|
| 6. |
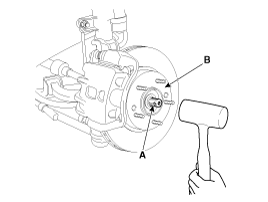
Using a plastic hammer, disconnect driveshaft (A) from the axle hub
(B).
|
| 7. |
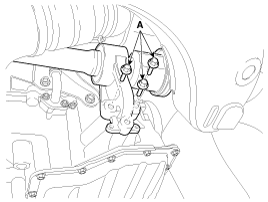
Loosen the inner shaft mounting bolt (A). (T-GDI Engine only)
|
| 8. |
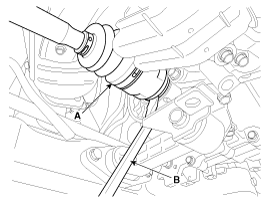
Insert a pry bar (A) between the transaxle case and joint case, and
separate the drive shaft (B) from the transaxle case.
|
| 9. |
Install in the reverse order of removal.
|
 Front Driveshaft Components and components location
Component
1. Driveshaft (LH)
2. Circlip
3. Driveshaft (RH)
...
 TJ Joint Components and components location
Components
[LH]
1. BJ assembly
2. BJ circlip
3. BJ boot band
4. BJ boot
5. Shaft
6. TJ boot band
7. TJ boot
8. Sp ...
Other information:
Kia Cee'd JD Owners Manual: Shift lock system
For your safety, the Dual clutch transmission
has a shift lock system which prevents
shifting the transaxle from P (Park)
or N (Neutral) into R (Reverse) unless
the brake pedal is depressed.
To shift the transaxle from P (Park) or N
(Neutral) into R (Reverse):
1. Depress and hold the bra ...
Kia Cee'd JD Owners Manual: Type of warning indicator and sound
✽ NOTICE
The actual warning sound and indicator may differ from the
illustration according
to objects or sensor status.
Do not wash the vehicle's sensor with high pressure water.
When driving rearward(at “R’ shift), Side sensor operates and if
detecting some
object at the ...
© 2017-2026 www.kceed.com
