Kia Cee'd: Intake And Exhaust System / Exhaust Manifold Repair procedures
Kia Cee'd JD Service Manual / Engine Mechanical System / Intake And Exhaust System / Exhaust Manifold Repair procedures
| Removal and Installation |
| 1. |
Remove the engine cover.
|
| 2. |
Disconnect the battery negative terminal.
|
| 3. |
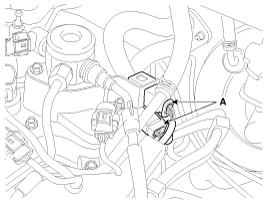
Disconnect the front and rear oxygen sensor connectors (A).
|
| 4. |
Remove the front muffler.
(Refer to Intake And Exhaust System - "Muffler")
|
| 5. |
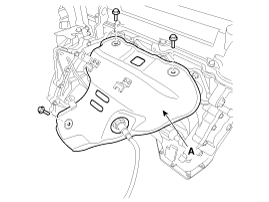
Remove the heat protector (A).
|
| 6. |
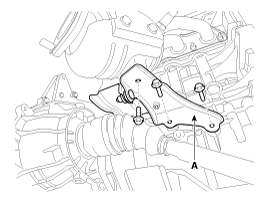
Remove the exhaust manifold stay (A).
|
| 7. |
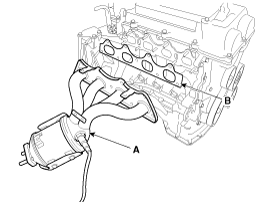
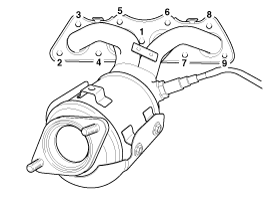
Remove the exhaust manifold (A) and gasket.
|
| 8. |
Install in the reverse order of removal.
|
 Exhaust Manifold Components and components location
Components
1. Heat protector
2. Exhaust manifold
3. Gasket
4. Exhaust manifold stay
...
 Muffler Components and components location
Components
1.
Front muffler
2. Gasket
3.
Hanger
4. Center & main muffler
...
Other information:
Kia Cee'd JD Service Manual: Components and components location
Components
1. Front seat belt
2. Height adjuster
3. Rear seat belt
4. Rear center seat belt
5. Rear seat belt buckle [LH]
6. Rear seat belt buckle [RH]
...
Kia Cee'd JD Owners Manual: Pairing through [PHONE]
Setup
Press the key Select
[Phone] Select [Pair Phone]
The following steps are the same as
those described in the section "When
No Devices have been Paired" on the
previous page.
✽ NOTICE
The waiting period during phone
pairing will last for one minute.
The pairing process will fai ...
© 2017-2026 www.kceed.com


