Kia Cee'd: Charging System / DC DC Converter Repair procedures
Kia Cee'd JD Service Manual / Engine Electrical System / Charging System / DC DC Converter Repair procedures
| Removal |
| 1. |
Disconnect the battery negative terminal.
|
| 2. |
Remove the glove box housing.
(Refer to Body - "Glove Box Housing")
|
| 3. |
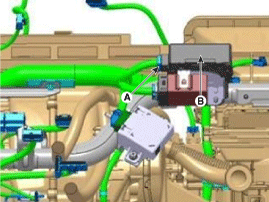
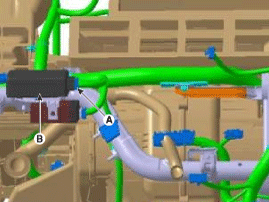
Disconnect the DC/DC converter conector (A).
|
| 4. |
Remove the DC/DC converter (B) after removing nuts.
[LHD]
[RHD]
|
| Installation |
| 1. |
Install in the reverse order of removal.
|
 DC DC Converter Schematic diagrams
Circuit Diagram
...
 Battery Description and operation
Description
1.
The MF(Maintenance Free) battery is, as the name implies, totally maintenance
free and has no removable battery cell caps.
2.
...
Other information:
: Jump Starting the Vehicle
Jump Starting Precautions
WARNING: Batteries normally
produce explosive gases which can
cause personal injury. Therefore, do not
allow flames, sparks or lighted
substances to come near the battery.
When working near the battery, always
shield your face and protect your eyes.
Always provide co ...
Kia Cee'd JD Service Manual: Air Cleaner Components and components location
Components
1. Air intake hose
2. Air cleaner cover
3. Air cleaner filter
4. Air cleaner body
5. Resonator
6. Air duct
...
© 2017-2026 www.kceed.com


