Kia Cee'd: Crash Pad / Crash Pad Center Panel Repair procedures
Kia Cee'd JD Service Manual / Body (Interior and Exterior) / Crash Pad / Crash Pad Center Panel Repair procedures
| Replacement |
|

|

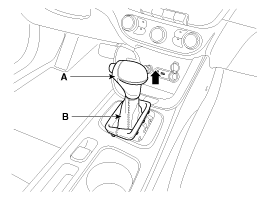
| 1. |
Remove the gear boots (B) and gear knob (A).
|
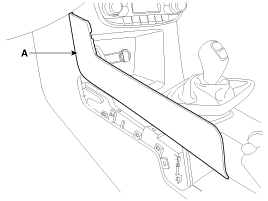
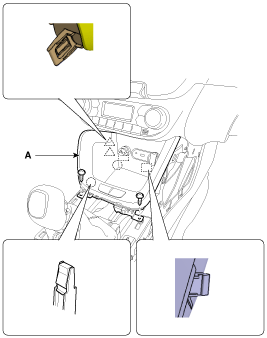
| 2. |
Using a screwdriver or remover, remove the console garnish (A).
[LH]
[RH]
|
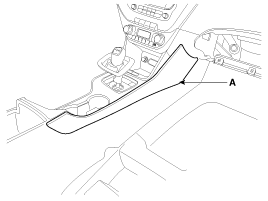
| 3. |
Using a screwdriver or remover, remove the console upper cover (A).
|
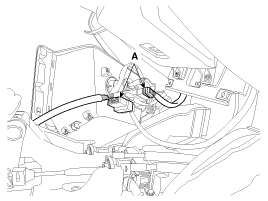
| 4. |
Disconnect the indicator connector (A).
|
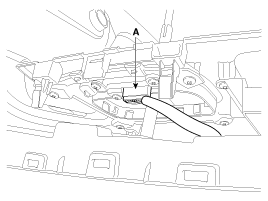
| 5. |
Disconnect the EPB switch connector (A).
|
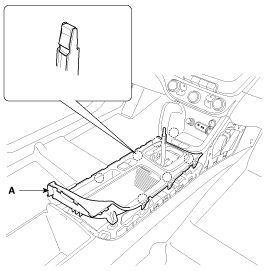
| 6. |
After loosening the mounting screws, then remove the console tray (A).
|
| 7. |
Disconnect the connectors (A).
|
| 8. |
Remove the crash pad lower panel.
(Refer to Crash Pad - "Crash Pad Lower Panel")
|
| 9. |
Remove the glove box housing.
(Refer to Crash Pad - "Glove Box Housing")
|
| 10. |
After loosening the mounting screws, then remove the crash pad center
lower panel (A).
|
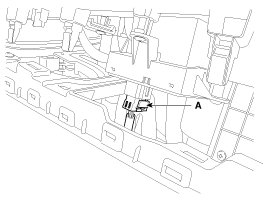
| 11. |
Disconnect the heater control unit connectors (A), console tray lamp
connector (B), heater hose (C).
|

| 12. |
Install in the reverse order of removal.
|

 Crash Pad Center Panel Components and components location
Component Location
1. Crash pad center lower panel
...
 Steering Column Shroud Panel Components and components location
Component Location
1. Steering column lower shroud
panel
2. Steering column upper shroud
panel
...
Other information:
Kia Cee'd JD Owners Manual: Basic Mode Screen
(1) Mode Display
Displays currently operating mode.
(2) Frequency
Displays the current frequency.
(3) Preset
Displays current preset number 1
~ 6.
(4) Preset Display
Displays saved presets.
(5) Auto Store
Automatically saves frequencies with
superior reception to Preset buttons.
(6 ...
Kia Cee'd JD Service Manual: Rear Center Seat Belt Retractor Repair procedures
Replacement
•
When installing the belt, make sure not to damage the retractor.
1.
Remove the rear seat back cover [RH].
(Refe ...
© 2017-2026 www.kceed.com
