
Kia Cee'd: Brake System / Brake Line Repair procedures
| Removal |
| 1. |
Disconnect the brake fiuid level switch connector, and remove the reservoir
cap.
|
| 2. |
Remove the brake fluid from the master cylinder reservior with a syringe.
|

| 3. |
Remove the wheel & tire.
|
| 4. |
Disconnect the brake tube by loosening the tube flare nut (B).
Front
Rear
|
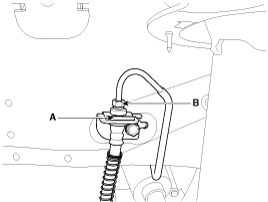
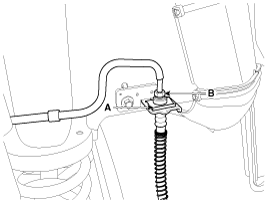
| 5. |
Remove the brake hose clip (A).
|
| 6. |
Disconnect the brake hose from the brake caliper by loosening the bolt
(C).
Front
Rear
|
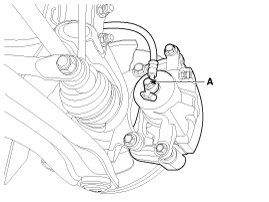
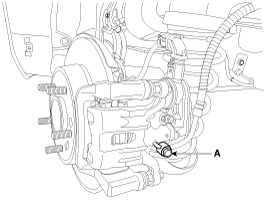
| Inspection |
| 1. |
Check the brake tubes for cracks, crimps and corrosion.
|
| 2. |
Check the brake hoses for cracks, damage and fluid leakage.
|
| 3. |
Check the brake tube flare nuts for damage and fluid leakage.
|
| 4. |
Check brake hose mounting bracket for crack or deformation.
|
| Installation |
| 1. |
Install in the reverse order of removal.
|
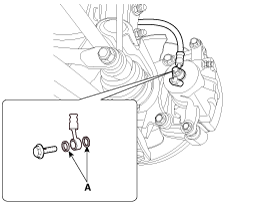
| 2. |
After installation, bleed the brake system.
(Refer to Brake system bleeding)
|
| 3. |
Check the spilled brake oil.
|
 Brake Line Components and components location
Components
...
 Brake Pedal Components and components location
Components [LHD]
1. Cowl bracket
2. Brake pedal member assembly
3. Stop lamp switch
4. Return spring
5. Brake pedal
6. Bolt
...
Other information:
: SYNC™ 3 Troubleshooting
Voice Recognition
USB and Bluetooth Audio
Phone
Navigation (If Equipped)
Apps
Wi-Fi Connectivity
Personal Profiles (If Equipped)
Resetting the System
Simultaneously press and hold the
seek up and the audio unit power
buttons until the screen goes black.
Wait three minutes to all ...
: Load Carrying Precautions
Keep your loaded vehicle weight
within its design rating capability,
with or without a trailer. Properly
loading your vehicle provides
maximum return of vehicle design
performance. Before you load your
vehicle, become familiar with the
following terms for determining
your vehicle’s weight ...
© 2017-2026 www.kceed.com
