Kia Cee'd: Rear Axle Assembly / Rear Hub - Carrier / Repair procedures
| Replacement |
| 1. |
Loosen the wheel nuts slightly.
Raise the vehicle, and make sure it is securely supported.
|
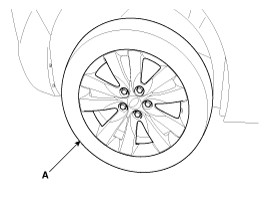
| 2. |
Remove the rear wheel and tire (A) from rear hub .
|

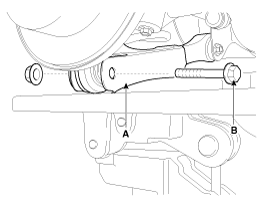
| 3. |
Remove the mounting bolt (B) of the rear lower arm (A) and the rear
carrier, while supporting the lower arm (A) with a jack as shown in
the illustration.
|
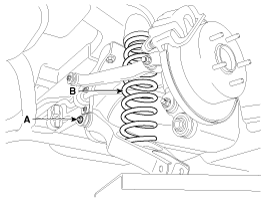
| 4. |
Loosen the mounting nut (A) of the cross member and the rear lower arm,
then remove the coil spring (B) by taking down the jack.
|
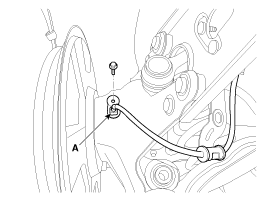
| 5. |
Disconnect the wheel speed sensor connector (A).
|
| 6. |
Disconnent the parking brake cable.
(Refer to Brake System - "Rear Disc Brake")
|
| 7. |
Remove the rear brake caliper.
(Refer to Brake System - "Rear Disc Brake")
|
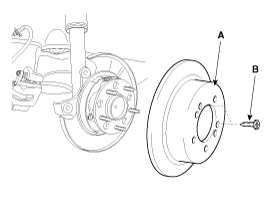
| 8. |
Remove the rear brake disc assembly (A) after loosen the screw (B).
|
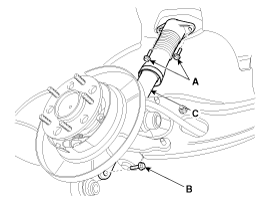
| 9. |
Remove the rear strut assembly (C) after loosen the bolt (A, B).
|
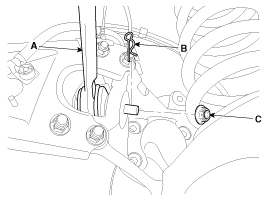
| 10. |
Remove the split pin (B) and castle nut (C) from the assist arm (A).
|
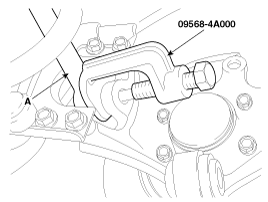
| 11. |
Using the SST (09568-4A000), disconnect the assist arm (A) from the
carrier assembly.
|
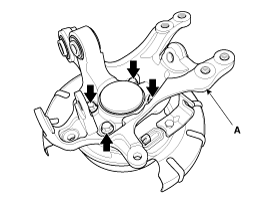
| 12. |
Remove the carrier assembly (A) from the trailing arm after remove the
mounting bolts.
|

| 13. |
Loosen the hub bearing mounting, and then remove the hub bearing from
knuckle (A).
|
| 14. |
Install in the reverse order of removal.
|
| Inspection |
| 1. |
Check the hub for cracks and the splines for wear.
|
| 2. |
Check the rear axle carrier for cracks.
|
| Installation |
| 1. |
Install in the reverse order of removal.
|

 Components and components location
Components
1. Carrier assembly
2. Rear brake assembly
3. Hub & bearing assembly
4. Rear brake disc
...

Other information:
Kia Cee'd JD Owners Manual: Tire Pressure Monitoring System
(TPMS) indicator
Low tire pressure telltale/
TPMS malfunction indicator
The low tire pressure telltale comes on
for 3 seconds after the ignition switch is
turned to the ON position.
The low tire pressure and position telltales
illuminates when one or more of
your tires is significantly underinflated.
...
: Replacement Parts Recommendation
We have built your vehicle to the highest
standards using quality parts. We
recommend that you demand the use of
genuine Ford and Motorcraft parts
whenever your vehicle requires scheduled
maintenance or repair. You can clearly
identify genuine Ford and Motorcraft parts
by looking for the Ford ...
