
Kia Cee'd: Fuses and Relays / Relay Box (Engine Compartment) Repair procedures
Kia Cee'd JD Service Manual / Body Electrical System / Fuses and Relays / Relay Box (Engine Compartment) Repair procedures
| Inspection |
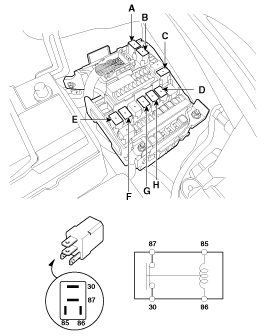
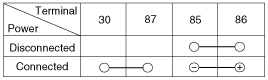
Power Relay Test (Type A)
|

Check for continuity between the terminals.
| A : C/Fan(Low) relay B : C/Fan(High) relay C : Blower relay D : SSB2(ACC) relay |
E : Rear defogger relay F : SSB4(IG2) relay G : SSB3(IG1) relay H : Start relay |
| 1. |
There should be continuity between the No.30 and No.87 terminals when
power and ground are connected to the No.85 and No.86 terminals.
|
| 2. |
There should be no continuity between the No.30 and No.87 terminals
when power is disconnected.
|
Power Relay Test (Type B)
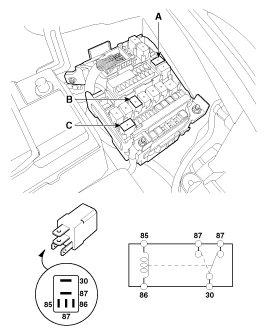
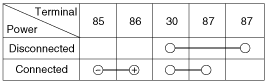
Check for continuity between the terminals.
A : ESS relay
B : Wiper relay
C : HAC relay
| 1. |
There should be continuity between the No.30 and No.87 terminals when
power and ground are connected to the No.85 and No.86 terminals.
|
| 2. |
There should be continuity between the No.30 and No.87 terminals when
power is disconnected.
|
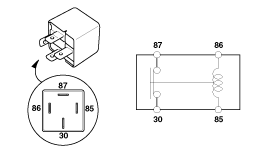
Power Relay Test (Type C)
Check for continuity between the terminals.
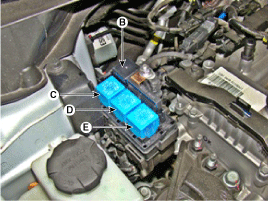
A : PTC(GSL)/Fuel heater relay(DSL)
B : Glow plug relay
C : PTC3 relay
D : PTC2 relay
E : PTC1 relay
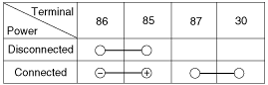
| 1. |
There should be continuity between the No.30, 87a and No.87 terminals
when power and ground are connected to the No.85 and No.86 terminals.
|
| 2. |
There should be no continuity between the No.30, 87a and No.87 terminals
when power is disconnected.
|
Replacement of EMS box
| 1. |
Disconnect the negative(-) battery terminal.
|
| 2. |
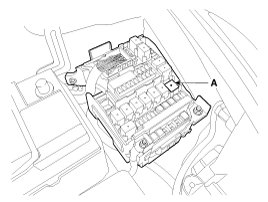
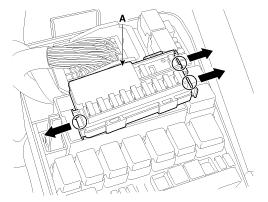
Push 3 hooks in the engine room relay box out to the arrow direction
and put up the EMS box assembly(A).
|
| 3. |
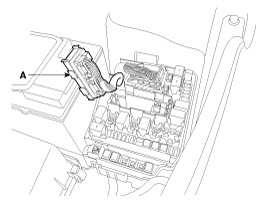
Disconnect the connector and remove the EMS box assembly(A).
|
Fuse Inspection
| 1. |
Be sure there is no play in the fuse holders, and that the fuses are
held securely.
|
| 2. |
Are the fuse capacities for each circuit correct?
|
| 3. |
Are there any blown fuses?
If a fuse is to be replaced, be sure to use a new fuse of the same capacity.
Always determine why the fuse blew first and completely eliminate the
problem before installing a new fuse.
|
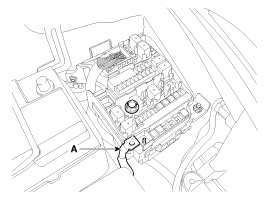
Multi Fuse
Multi Fuse is for optimizing the engine room package.
|


Other information:
: Intelligent Adaptive Cruise Control
How Does Intelligent Adaptive Cruise Control Work
Intelligent adaptive cruise control
combines speed sign recognition with
adaptive cruise control to adjust the cruise
set speed to the speed limit detected by
the speed sign recognition system. As the
system detects new speed signs, the set
spe ...
: Opening and Closing the Moonroof
WARNING: Do not leave children
unattended in your vehicle and do not
let them play with the moonroof. Failure
to follow this instruction could result in
personal injury.
WARNING: When closing the
moonroof, verify that it is free of
obstruction and make sure that children
and pets are not in t ...
© 2017-2026 www.kceed.com
