
Kia Cee'd: Parking Brake System / Parking Brake Cable Repair procedures
Kia Cee'd JD Service Manual / Brake System / Parking Brake System / Parking Brake Cable Repair procedures
| Removal |
The parking brake cables must not be bent or distorted. This will lead
to stiff operation and premature failure.
|

| 1. |
Remove the floor console assembly.
(Refer to Body - "Floor console")
|
| 2. |
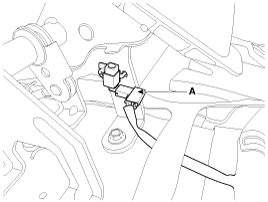
Disconnect the connector (A) of parking brake switch.
|
| 3. |
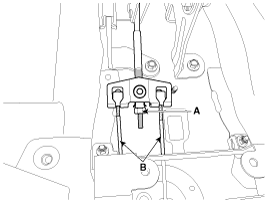
Loosen the adjusting nut (A) and the parking brake cables (B).
|
| 4. |
Raise the vehicle, and make sure it is securely supported.
|
| 5. |
Remove the rear tire and wheel.
|
| 6. |
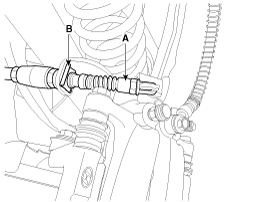
Remove the parking brake cable (A), after removing the clip (B).
|
| 7. |
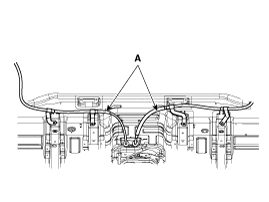
Loosen the parking brake cable bracket bolts and remove the parking
brake cable (A).
|
| Installation |
| 1. |
Install the parking brake cable (A).
|
| 2. |
Install the parking brake cable (A), and then install the clip (B).
|
| 3. |
Install the rear tire and wheel.
|
| 4. |
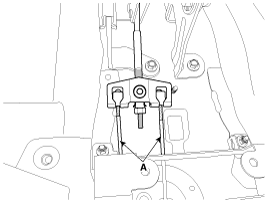
Install the parking brake cable (A).
|
| 5. |
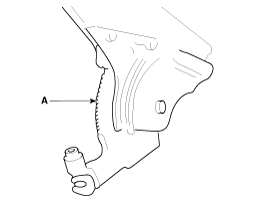
Apply a coating of the specified grease to each sliding parts (A) of
the ratchet plate or the ratchet pawl.
|
| 6. |
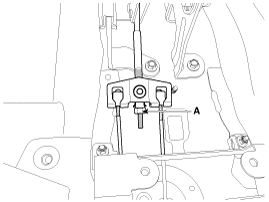
Install the parking brake cable adjuster, then adjust the parking brake
lever stroke by turning adjusting nut (A).
|
| 7. |
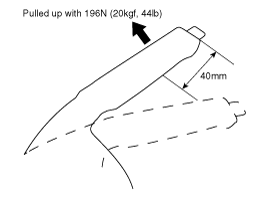
Release the parking brake lever fully, and check that parking brakes
do not drag when the rear wheels are turned. Readjust if necessary.
|
| 8. |
Make sure that the parking brakes are fully applied when the parking
brake lever is pulled up fully.
|
| 9. |
Reconnect the connector (A) of parking brake switch.
|
| 10. |
Install the floor console.
(Refer to Body - "Floor console")
|
| Adjustment |
Parking Brake Lever Stroke Adjustment
| 1. |
Remove the floor console.
(Refer to Body - "Floor console")
|
| 2. |
Apply the brake pedal 20 times with the force of 10kgf after bleeding.
Then, for the cable to settle in, apply the parking brake full stroke
more than 3 times.
|
| 3. |
Install the parking brake cable adjuster, then adjust the parking brake
lever stroke by turning adjusting nut (A).
|
| 4. |
Release the parking brake lever fully, and check that parking brakes
do not drag when the rear wheels are turned. Readjust if necessary.
|
| 5. |
Make sure that the parking brakes are fully applied when the parking
brake lever is pulled up fully.
|
| 6. |
Install the floor console.
(Refer to Body - "Floor console")
|
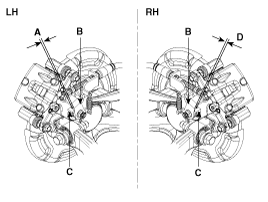
Rear Brake Caliper Gap
Re-setting of the parking brake is necessary after overhauling the caliper
body, or if the brake calipers, housing, parking brake cable or brake
discs have been changed.
|
| 1. |
Remove the floor console to reach the adjusting nut.
|
| 2. |
Loosen the parking brake cable until both operating levers rest in fully
off position.
|
| 3. |
Bring the brake pads in their operating position by pressing the brake
pedal down several times until there is resistance.
|
| 4. |
Tension the parking brake cable by tightening the adjusting nut, until
the operating levers on both calipers lift from the stop, up to a distance
of (A) and (D) between operating lever (B) and stopper (C).
|
| 5. |
Refit the floor console.
|
| 6. |
Parking brake lever in the car must be in fully loosened position.
|
| 7. |
If the handbrake cables where changed, actuate the parking brake a few
times with maximum force to stretch the parking brake cables, and then
control adjusting as above.
|
| 8. |
Check the wheels of their free operation.
|
| 9. |
Test drive.
|
 Parking Brake Lever Repair procedures
Removal
The parking brake cables must not be bent or distorted. This will lead
to stiff operation and prema ...
 Electronic Parking Brake (EPB) Components and components location
Components
1. EPB Unit
2. EPB Switch
3. Brake Caliper
4. EPB Warning Lamp
...
Other information:
Kia Cee'd JD Owners Manual: Good braking practices
WARNING
Whenever you leave or park your
vehicle, always set the parking
brake as far as possible and fully
engage the vehicle's transaxle
into the P (Park) position. If the
parking brake is not fully
engaged, the vehicle may move
inadvertently and injure yourself
and othe ...
Kia Cee'd JD Service Manual: TJ Joint Components and components location
Components
[LH]
1. BJ assembly
2. BJ circlip
3. BJ boot band
4. BJ boot
5. Shaft
6. TJ boot band
7. TJ boot
8. Spider assembly
9. Retainer ring
10. TJ housing
11. Housing circlip
...
© 2017-2026 www.kceed.com
