Kia Cee'd: Indicators and Gauges / Instrument Cluster Repair procedures
| Inspection |
| 1. |
Adjust the pressure of the tires to the specified level.
|
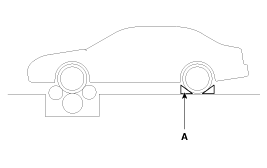
| 2. |
Drive the vehicle onto a speedometer tester. Use wheel chocks (A) as
appropriate.
|
| 3. |
Check if the speedometer indicator range is within the standard values.
[km/h]
[mph]
|


| 1. |
Connect the GDS to the diagnostic link connector or install a tachometer.
|
| 2. |
With the engine started, compare the readings of the tester with that
of the tachometer. Replace the tachometer if the tolerance is exceeded.
|
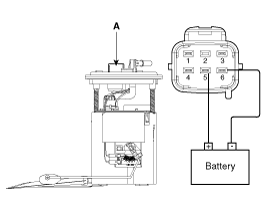
| 1. |
Disconnect the fuel sender connector from the fuel sender.
|
| 2. |
Remove the fuel pump assembly.
|
| 3. |
Check motor operation by fuel pump connector (A) connecting power (No.4)
and ground (No.5).
|
| 1. |
Turn the ignition switch OFF, and then remove battery (-) cable.
|
| 2. |
Remove the fuel pump assembly.
|
| 3. |
Using an ohmmeter, measure the resistance between terminals 1 and 3
of sender connector (A) at each float level.
|
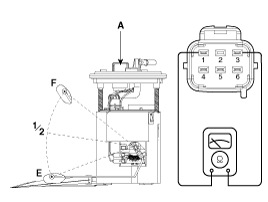
| 4. |
Also check that the resistance changes smoothly when the float is moved
from "E" to "F".
|
| 5. |
If the height resistance is unsatisfied, replace the fuel sender as
an assembly.
|
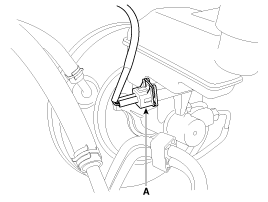
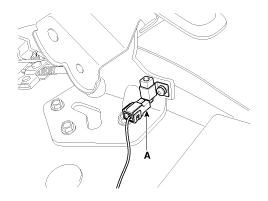
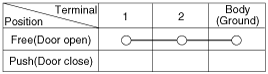
| 1. |
Remove the connector (A) from the switch located at the brake fluid
reservoir.
|
| 2. |
Verify that continuity exists between switch terminals 1 and 2 while
pressing the switch (float) down with a rod.
|
| 1. |
Ignition "ON"
|
| 2. |
Release the parking brake.
|
| 3. |
Remove the connector from the brake fluid level warning switch.
|
| 4. |
Ground the connector at the harness side.
|
| 5. |
Verify that the warning lamp lights.
|
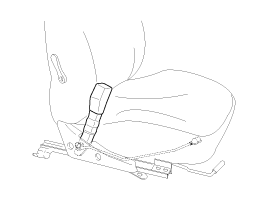
| 1. |
Check that there is continuity between the terminal and switch body
with the switch ON (Lever is pulled).
|
| 2. |
Check that there is no continuity between the terminal and switch body
with the switch OFF (Lever is released).
If continuity is not as specified, replace the switch or inspect its
ground connection.
|
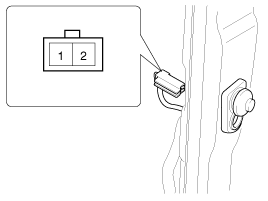
| 1. |
Remove the connector from the switch.
|
| 2. |
Check for continuity between terminals.
|
|
Seat belt condition |
Warning lamp |
|
Fastened |
OFF |
|
Not fastened |
ON |
| 1. |
It will be able to diagnose defects of CLU with GDS quickly. GDS can
operates actuator forcefully, input/output value monitoring and self
diagnosis.
|
| 2. |
Select model and "BCM".
|
| 3. |
Select the "Cluster Moduel" to check.
|
| 4. |
Select "Input/output monitoring", if you will check current data of
instrument cluster.
|
| 5. |
If you will check each module data operation forcefully, select "Actuation
test".
|
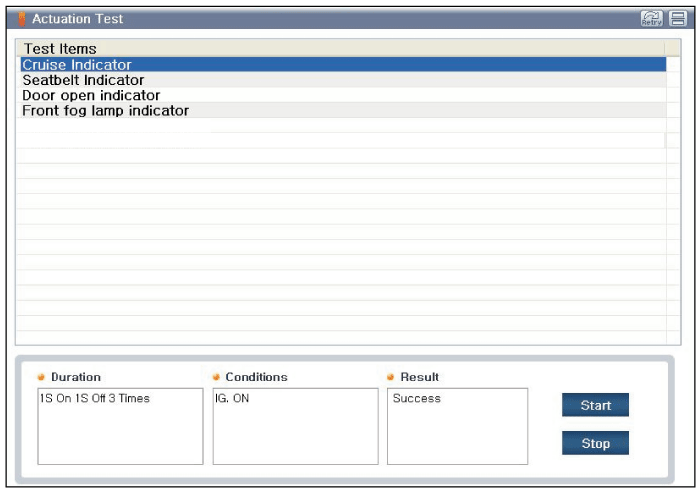
| 6. |
To check the DTC of the each module, select "DIAGNOSTIC TROUBLE CODES".
|
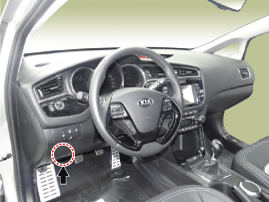
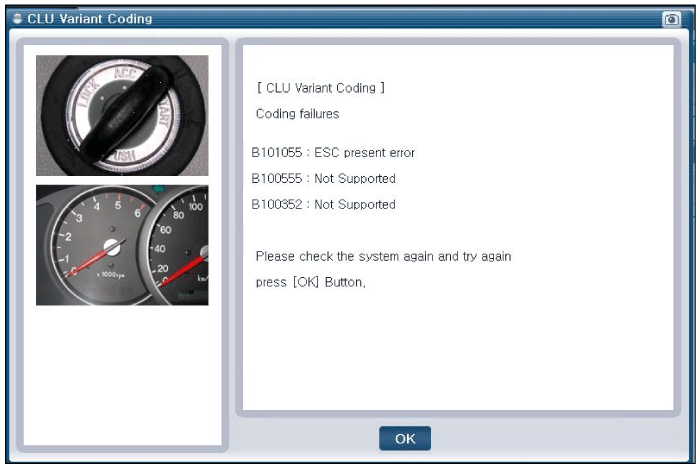
| 1. |
Connect the cable of GDS to the data link connector in driver side crash
pad lower panel, turn the power on GDS.
|
| 2. |
Select model and "BCM".
|
| 3. |
Select Variant coding mode to perform.
|

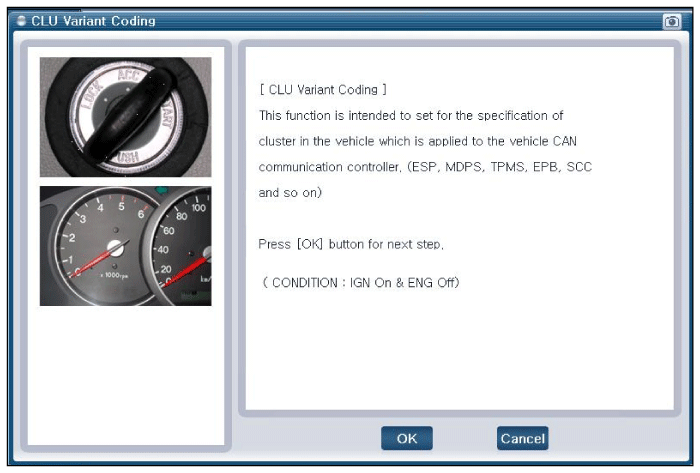
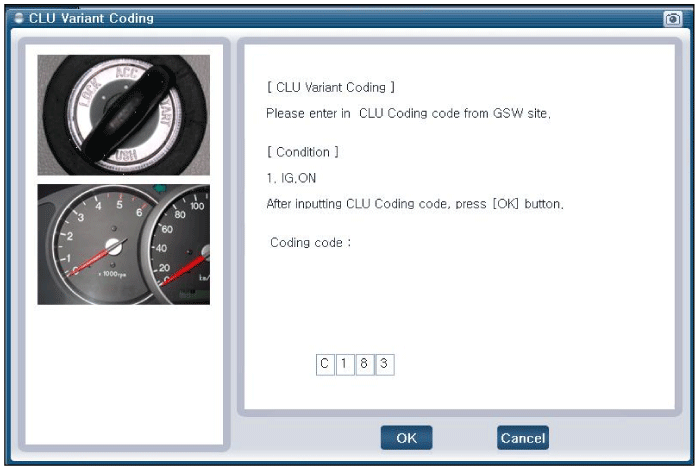
| 4. |
If the trouble codes occurred when performing variant coding, try the
CLU variant coding again after checking the installation status of CLU
system.
|
| Removal |
|
| 1. |
Disconnect the negative (-) battery terminal.
|
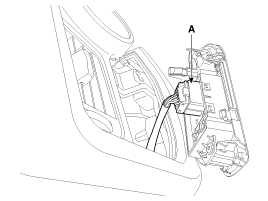
| 2. |
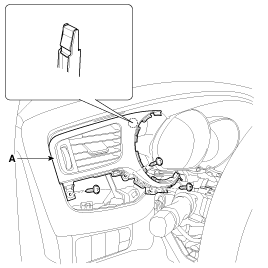
Using a screwdriver or remover, remove the crash pad garnish [LH] (A).
|

| 3. |
Disconnect the power door mirror switch connector (A).
|
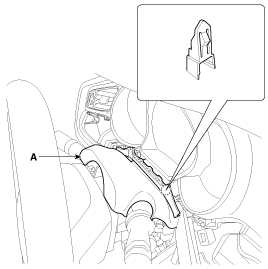
| 4. |
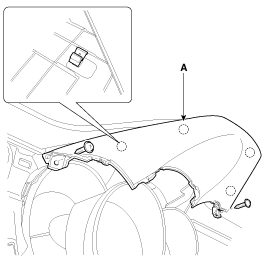
Using a screwdriver or remover, remove the steering column upper shroud
panel (A).
|
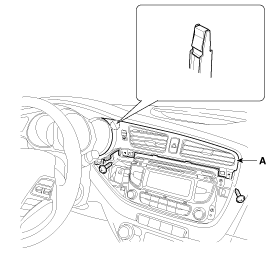
| 5. |
Using a screwdriver or remover, remove the cluster fascia cylinder panel
(A).
|
| 6. |
Using a screwdriver or remover, remove the center fascia panel (A).
|
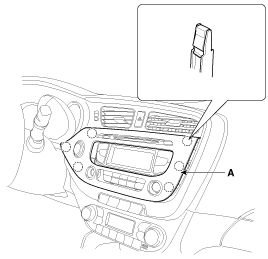
| 7. |
Disconnect the start/stop button connector (A).
|
| 8. |
After loosening the mounting screws, then remove the center airvent
duct (A).
|
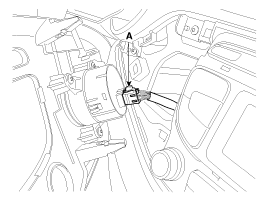
| 9. |
Disconnect the hazard switch connector (A) and trip switch connector
(B).
|
| 10. |
After loosening the mounting screws, then remove the side airvent duct
[LH] (A).
|
| 11. |
After loosening the mounting screws, then remove the cluster fascia
upper panel (A).
|
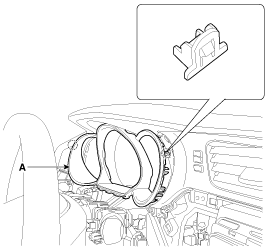
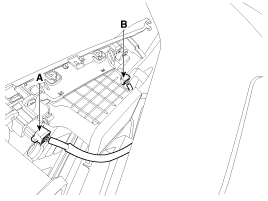
| 12. |
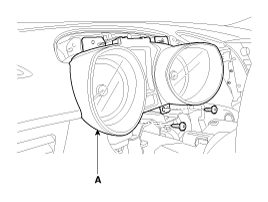
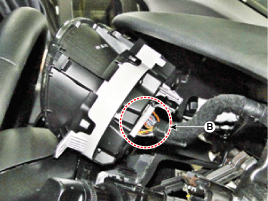
Remove the cluster (A) after loosening screws and disconnecting a connector
(B).
|
| Installation |
| 1. |
Install the cluster to the crash pad.
|
| 2. |
Install the cluster fascia upper panel, side airvent duct [LH], crash
pad garnish [LH] and center airvent duct.
|
| 3. |
Install the cluster fascia cylinder panel, center fascia panel, shroud
panel and crash pad lower panel.
|
 Instrument Cluster Schematic diagrams
Circuit Diagram
[Standard]
[Supervision]
...
 Power Door Locks
...
Other information:
: HD Radio™ Information (If Available)
To activate HD radio, please see the Radio
Settings in the Settings Chapter.
Note: HD Radio broadcasts are not
available in all markets.
HD Radio technology is the digital
evolution of analog AM/FM radio. Your
system has a special receiver that allows
it to receive digital broadcasts (where
av ...
Kia Cee'd JD Owners Manual: Tailgate unlock (3)
1. Press the tailgate unlock button for
more than 1 second.
2. The hazard warning light will blink
twice to indicate the tailgate is
unlocked.
✽ NOTICE
After unlocking the tailgate, the tailgate
will lock automatically unless it is
opened within 30 seconds.
Once the tailgate is ...
