
Kia Cee'd: Dual Clutch Transmission Assembly / Dual Clutch Transmission(DCT) Repair procedures
Kia Cee'd JD Service Manual / Dual Clutch Transmission(DCT) System / Dual Clutch Transmission Assembly / Dual Clutch Transmission(DCT) Repair procedures
| Removal |
| 1. |
Remove the engine cover.
(Refer to Engine Mechanical System - "Engine cover")
|
| 2. |
Remove the air cleaner assembly and air duct.
(Refer to Engine Mechanical System - "Air cleaner")
|
| 3. |
Remove the battery and battery tray.
(Refer to Engine Electrical System - "Battery")
|
| 4. |
Remove the ECM.
(Refer to Fuel System - "Engine Control Module (ECM)")
|
| 5. |
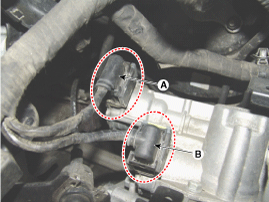
Disconnect the shift actuator connector (A) and select actuator connector
(B). Then remove the wire fixing clip.
|
| 6. |
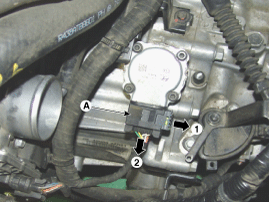
Disconnect the odd clutch actuator motor connector (A), and then remove
the wire fixing clip.
|
| 7. |
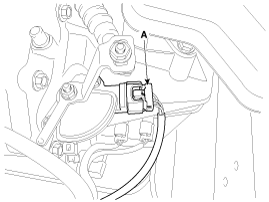
Disconnect the inhibitor switch connector (A).
|
| 8. |
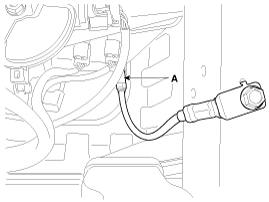
Remove the bolt (A), and then disconnect the ground wire.
|
| 9. |
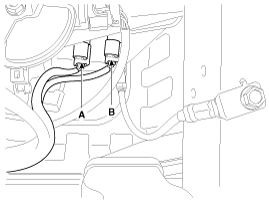
Disconnect the input shaft speed sensor 2 (A) and input shaft speed
sensor 1 (B) connectors.
|
| 10. |
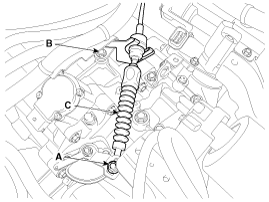
Remove the nut (A) and bolt (B). Then remove the shift cable (C).
|
| 11. |
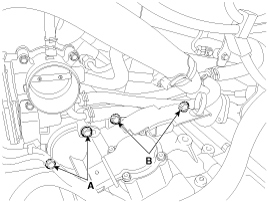
Remove the Dual Clutch Transmission(DCT) upper mounting bolts (A: 2ea,
B: 2ea).
|
| 12. |
Remove the cowl top cover.
(Refer to Body - "Cowl Top Cover")
|
| 13. |
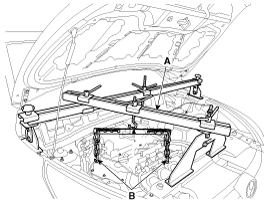
Assemble the engine support fixture.
(Refer to Special Service Tools - "Engine support fixture assembly drawing")
|
| 14. |
Install the engine support fixture special tool(A) on the engine room.
|
| 15. |
Hang the ring (B) on the engine hanger, support the engine.
|

| 16. |
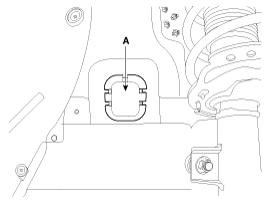
Remove the mounting cover (A).
|
| 17. |
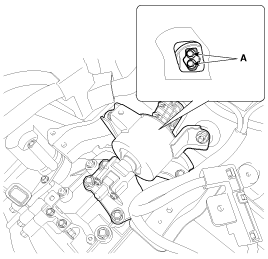
Support the Dual Clutch Transmission(DCT) on the lower section, and
remove the DCT support bracket mounting bolt (A).
|
| 18. |
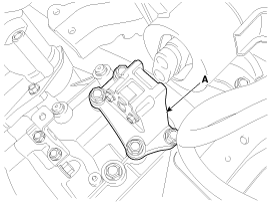
Loosen the mounting bolt and then remove the Dual Clutch Transmission(DCT)
support bracket (A).
|
| 19. |
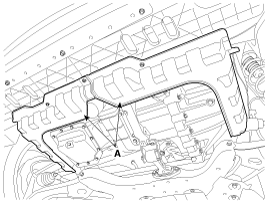
Remove the under cover (A).
|
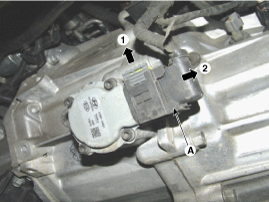
| 20. |
Disconnect the even clutch actuator motor connector (A).
|
| 21. |
Remove the drive shaft.
(Refer to Driveshaft and Axle - "Front Driveshaft")
|
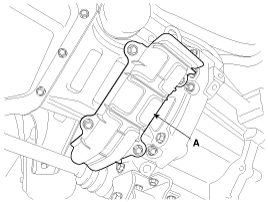
| 22. |
Loosen the mounting bolt and then remove the bracket (A).
|
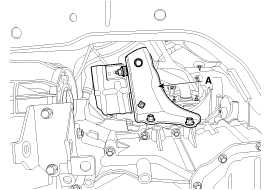
| 23. |
Remove the drive shaft cover (A).
|
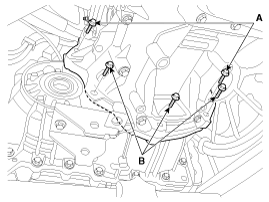
| 24. |
Remove the mounting bolts (A, B) after supporting the transmission by
a jack.
|
| 25. |
Remove the transaxle while slowly lower the jack.
|
| Installation |
If the transmission case oil seal is damaged, and there is leak, then
replace the oil seal with a new one.
Use the oil seal installer (09453-2F300) when you install the oil seal.
|
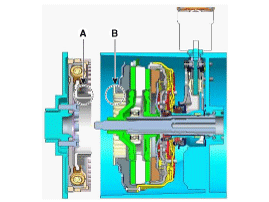
| 1. |
Align the external damper spline (A) on the engine side with the dual
clutch spline (B).
|
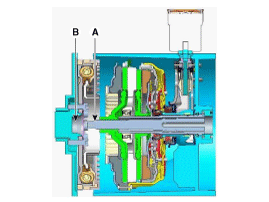
| 2. |
First insert the input shaft (A) to the engine pilot bearing (B) and
then affix the transmission towards the engine.
|

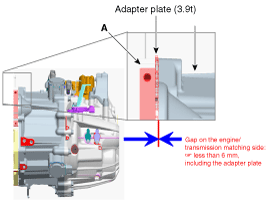
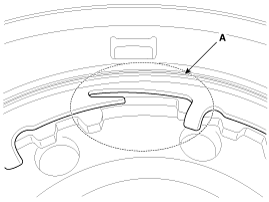
| 3. |
Make sure that there is no gap on the matching side when assembling
the engine block (A) and the transmission.
Then tighten the bolts (engine and transmission mounting bolts).
|
| 4. |
Refill Dual Clutch Transmission(DCT) oil.
(Refer to Dual Clutch Transmission Assembly - "Fluid")
|
| 5. |
Always use the GDS to delete the error code (DTC) after Dual Clutch
Transmission(DCT) and TCM maintenance.
The error code (DTC) cannot be deleted by disconnecting the battery
terminal.
|
| 6. |
You must perform TCM learning after you change the transmission to prevent
delayed transmission shift and shock during acceleration or when starting
to move.
(Refer to Dual Clutch Transmission(DCT) System - "Repair Procedure")
|
 Dual Clutch Transmission(DCT) Components and components location
Components
1. Odd clutch actuator motor
2. Even clutch actuator motor
3. Input shaft speed sensor 2
4. Intput shaft speed sensor 1
5. Inhibitor swi ...
 Transmission Gear Oil Specifications
Specified Lubricant
Item
Specified lubricant
Capacity
Transmission oil
SAE 75W/85, API GL-4
Approx. ...
Other information:
Kia Cee'd JD Service Manual: Specifications
Specifications
Item
Specification
Power source
DC 14.4V (-) ground
Frequency range / Channel space
FM : 87.5 ~ 108 MHz / 50 KHz
AM : 522 ~ 1620 KHz / 9 KHz
Tuning type
...
Kia Cee'd JD Owners Manual: Towing service
If emergency towing is necessary, we
recommend having it done by an authorized
Kia dealer or a commercial tow-truck
service. Proper lifting and towing procedures
are necessary to prevent damage
to the vehicle. The use of wheel dollies or
flatbed is recommended.
For trailer towing guid ...
© 2017-2026 www.kceed.com
