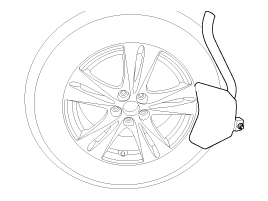
Kia Cee'd: Tire Pressure Monitoring System / TPMS Sensor Repair procedures
| Removal |
| 1. |
Remove the valve core and deflate the tire.
|
| 2. |
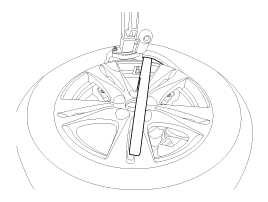
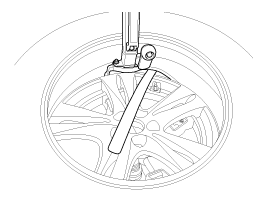
Remove the side of the tire bead area from the wheel using tire changing
machine .
|

| 3. |
Rotate the wheel clockwise.
|
| 4. |
The valve during transportation (air inlet portion of the silver) deviated
from its original location be sure to check whether the original position
of the valve (metal brackets) are assembled in indented state.
|
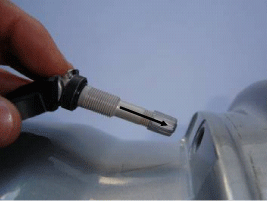
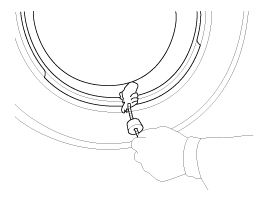
| 5. |
While tightening the nut on the valve as not to deviate from the fixed
position while rotating the valve to a fixed location (metal brackets
to fit inside) and push. The specified torque (8Nm) to tighten the nut
does not reuse.
|
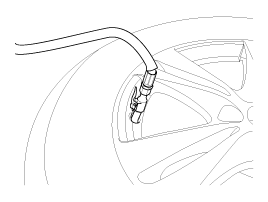
| 6. |
Contact with the rim so that the valve washer seals the valve hole put
into.
|
| 7. |
Housing with two fingers holding the valve in the axial direction with
one finger and push the valve.
|
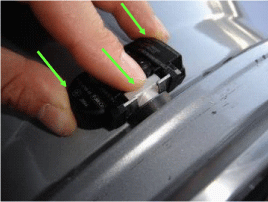
| 8. |
Housing, the state must be visible laser marking.
|
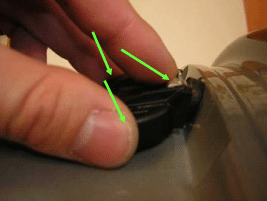
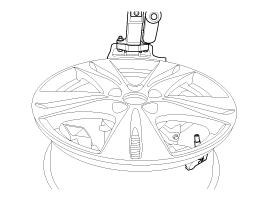
| 9. |
When the valve is fully inserted so that the contact between the sensor
and the rim while keeping hands on the wheel nut tightening will start
Wed.
|
| 10. |
While maintaining the position of the valve and the sensor is mounted
nut.
|
| 11. |
Apply tire soap or lubrication to the top and bottom tire beads.
|
| 12. |
To fit the bottom bead, position the sensor at the 5 o’clock position
relative to the head on the tire changing machine
|
| 13. |
Place the tire on the rim so the bottom bead touches the edge of the
rim after the sensor (@6 o’clock). Rotate the rim clockwise, and push
down on the tire at the 3 o’clock position to fit bottom bead.
|
| 14. |
After bottom bead is on tire, rotate the rim until the sensor is at
the 5 o’clock position relative to the head on the tire changing machine.
Push down on the tire at the 3 o’clock position and rotate the rim clockwise
to fit the top bead.
|
| 15. |
Inflate the tire until both beads seat.
|
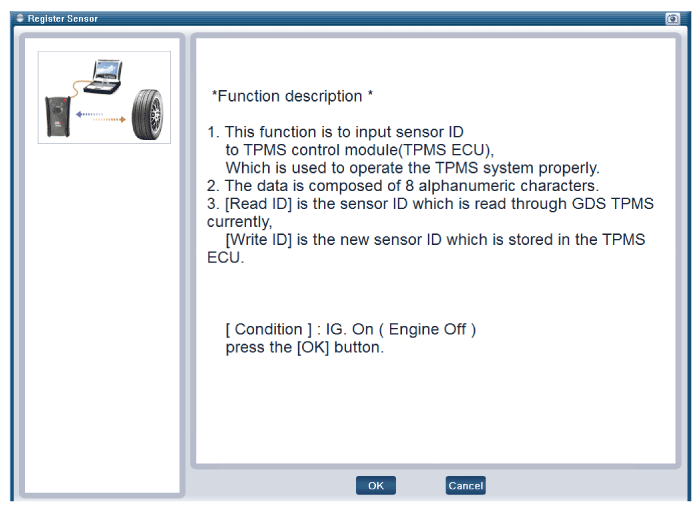
| 16. |
In the case of TPMS sensor failure, TPMS sensor needs learning. Faulty
sensor is replaced new units, conduct learning of TPMS sensors.
|
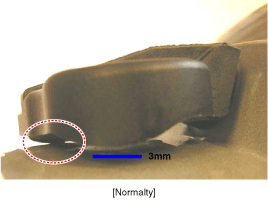
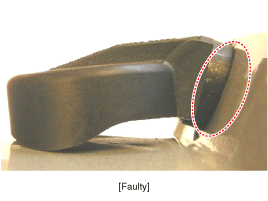
| Inspection |
| After installing TPMS sensor test methods Thai |
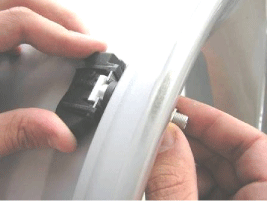
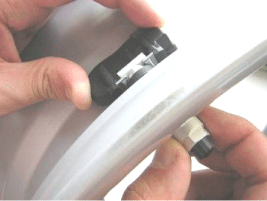
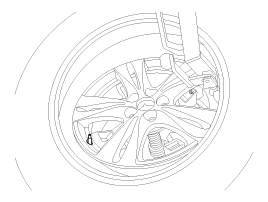
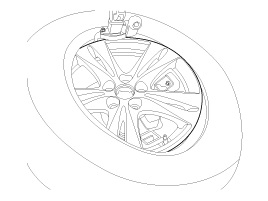
| 1. |
Sealing washer on the outside rim of hole to be compressed.
|
| 2. |
The lower part of the valve housing, a fixed place (no metal brackets)
should be located
|
| 3. |
Housing is at least one or more points on the surface of the rim should
contact.
|
| 4. |
The rim of the housing mounting height shall not exceed the height of
the chin.
|
| Replacement |
| Repair tire after using the Tire Mobility Kit (TMK) |
| 1. |
Remove the TMK repaired tire, wheel and TPMS sensor.
(Refer to "Tire removal")
|
| 2. |
Remove the sealant on the wheel and TPMS sensor (A) completely.
|
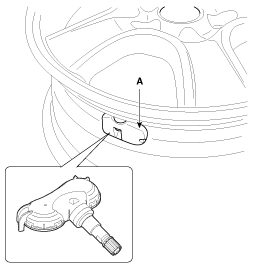
| 3. |
Install the TPMS sensor to the new tire.
|
| 4. |
Check that the normal operation of TPMS system.
|
| 1. |
Remove the TMK repaired tire, wheel and TPMS sensor.
(Refer to "Tire removal")
|
| 2. |
Remove the sealant on the wheel and TPMS sensor (A) completely.
|
| 3. |
Install the TPMS sensor to the new tire.
|
| 4. |
Check the tire pressure using the electrical tire pressure gauge.
|
| 5. |
Check the tire pressure of TPMS sensor using the GDS
|
| 6. |
If the difference between two checked pressures in the above is not
more than 2 psi, TPMS sensor is normal. Reinstall it to new tire.
|
| 7. |
If the difference between two checked pressures in the above is more
than 2 psi, TPMS sensor is abnormal. Install new TPMS sensor to new
tire.
|
| 8. |
Check that the normal operation of TPMS system.
|
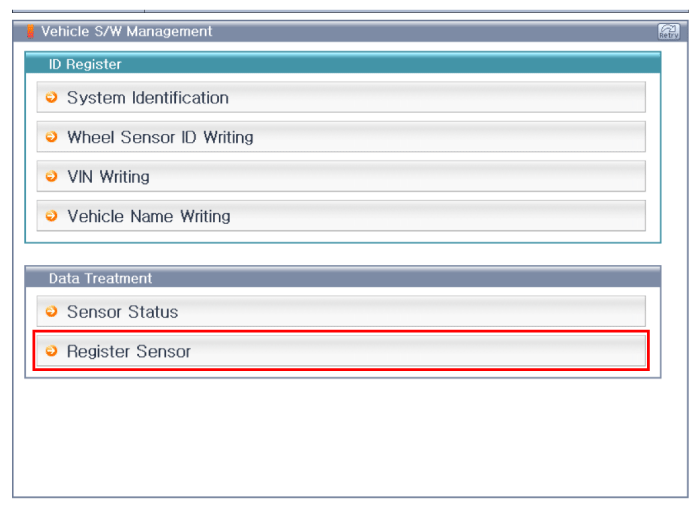
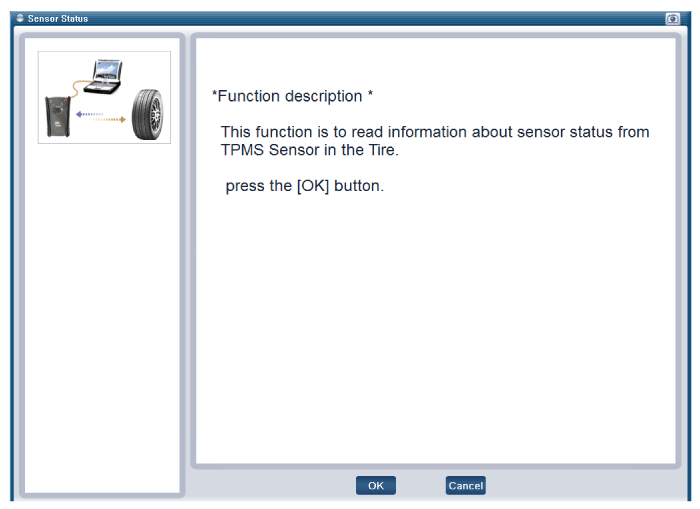
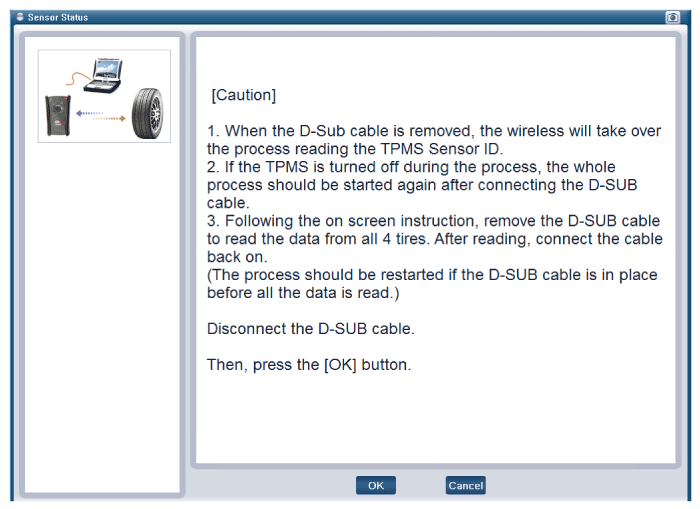
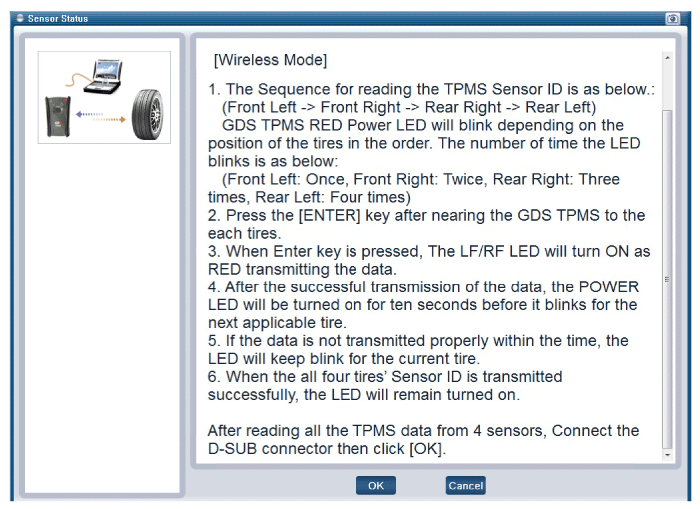
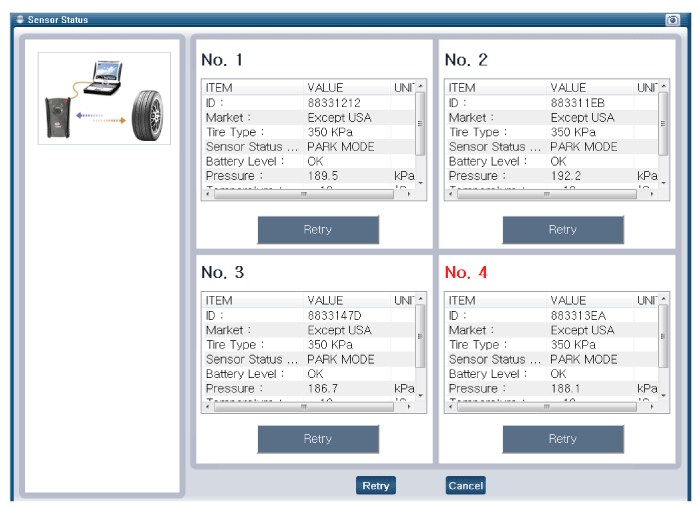
| Diagnosis procedure by using diagnostic device |
| 1. |
Connect self-diagnosis connector(16pins) located in the lower of driver
side crash pad to self-diagnosis device, and then turn the self-diagnosis
device after key is ON.
|
| 2. |
Select the "vehicle model" and "TPMS" on GDS vehicle selection screen,
then select OK.
|

|

|

|
 TPMS Sensor Description and operation
Description
1.
Function
•
By detecting the pressure, temperature, acceleration, and battery
condition, transmit informat ...
 TPMS Receiver Description and operation
Description
It search automatically sensor location and learn the new sensor.
To check defect of system or vehicle, use the sensor information, distance,
indistinct noise, ...
Other information:
Kia Cee'd JD Owners Manual: Theft-alarm stage
The alarm will be activated if any of the
following occurs while the system is
armed.
A front or rear door is opened without
using transmitter or smart key.
The tailgate is opened without using
transmitter or smart key.
The engine hood is opened.
The siren will sound and the haz ...
Kia Cee'd JD Owners Manual: Folding the rear seat
The rear seatbacks (or cushions) may be
folded to facilitate carrying long items or
to increase the luggage capacity of the
vehicle.
WARNING
The purpose of the fold-down rear
seatbacks (or cushions) is to allow
you to carry longer objects than
could otherwise be accommodated.
Never a ...
