Kia Cee'd: Tire Pressure Monitoring System / TPMS Receiver Repair procedures
Kia Cee'd JD Service Manual / Suspension System / Tire Pressure Monitoring System / TPMS Receiver Repair procedures
| Replacement |
When the receiver first arrives for replacement:
|

It is important to make sure that the correct receiver is used to replace
the faulty part i.e.
|

| 1. |
Disconnect the negative (-) battery cable.
|
| 2. |
Remove the main crash pad Assembly.
(Refer to Body (Interior and Exterior) - "Main Crash Pad Assembly")
|
| 3. |
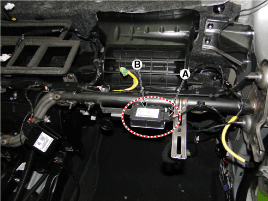
Connector (A) After removing the new receiver (B), must be replaced.
|
| 4. |
Install in the reverse order of removal.
|
| 5. |
Re-connect battery and turn Ignition on.
|
| 6. |
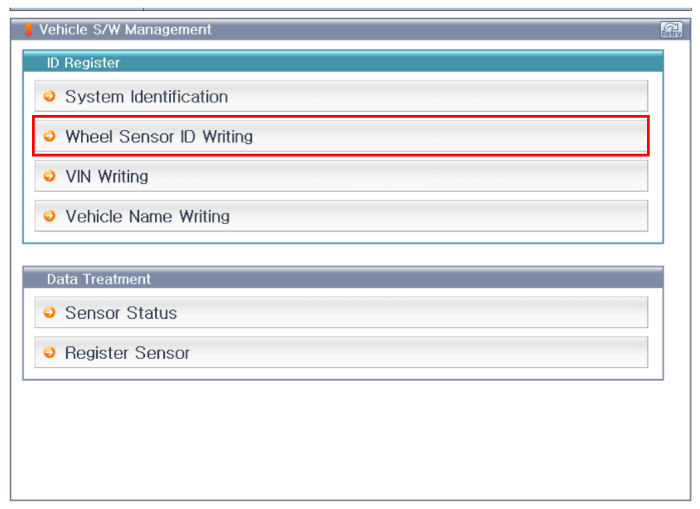
After replacing the receiver, learn by using self-diagnosis device(GDS).
|
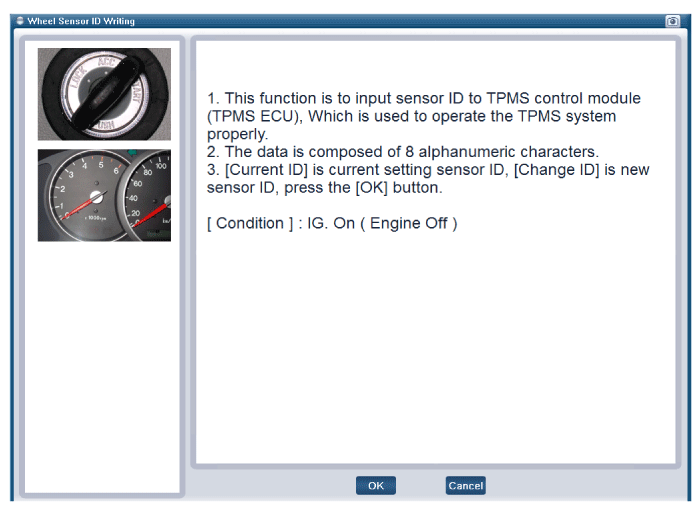
[Wheel Sensor ID Writing (Wireless) initialization]
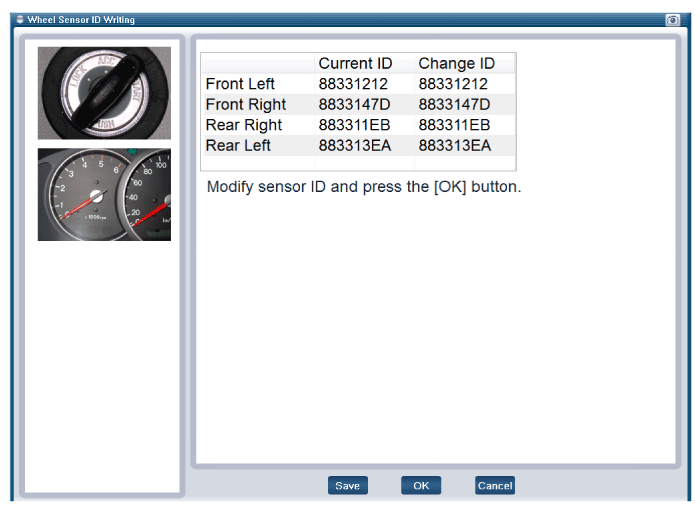
[Wheel Sensor ID Writing (Wireless) 1]
[Wheel Sensor ID Writing (Wireless) 2]
| Diagnosis procedure by using diagnostic device |
As manual for diagnosis methods by using diagnosis device, the main contents
are as follows:
| 1. |
Connect self-diagnosis connector(16pins) located in the lower of driver
side crash pad to self-diagnosis device, and then turn the self-diagnosis
device after key is ON.
|
| 2. |
Select the "vehicle model" and "TPMS" on GDS vehicle selection screen,
then select OK.
|
[Vehicle name input initialization]
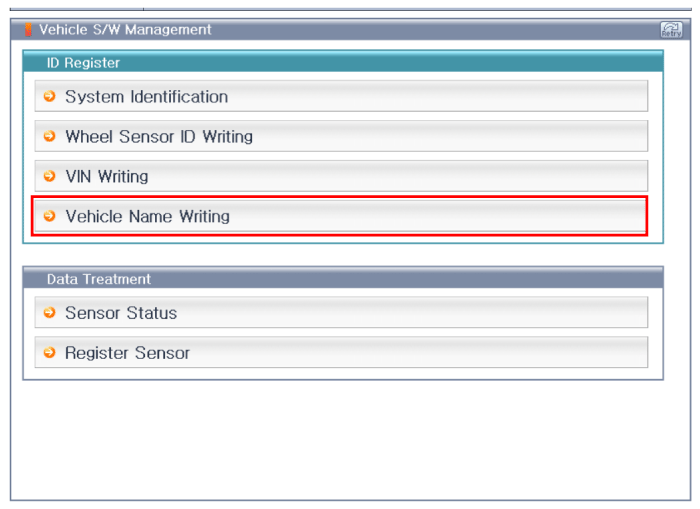
[Vehicle Name Writing 1]
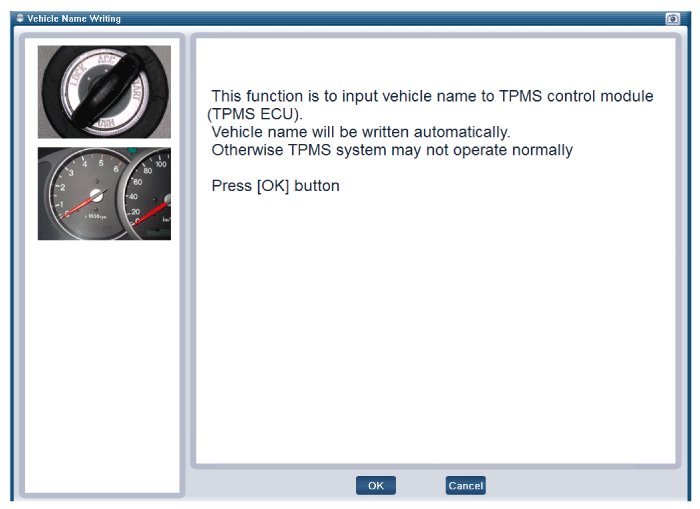
[Vehicle Name Writing 2]
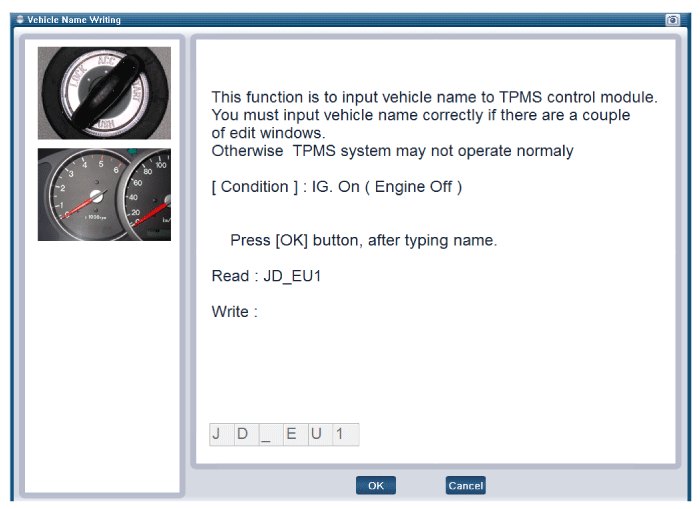
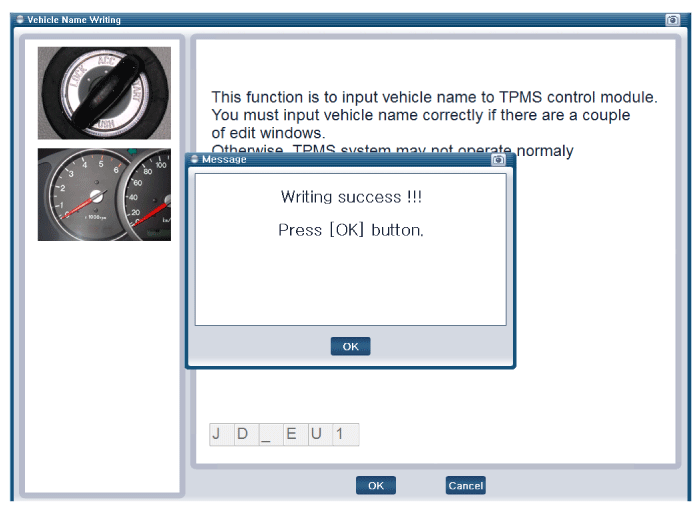
|

[Vehicle Name Writing 3]
[VIN input initialization]
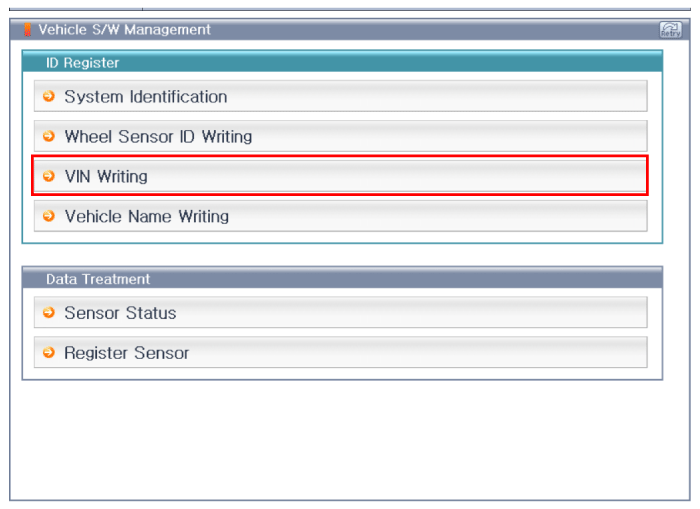
[VIN Writing 1]
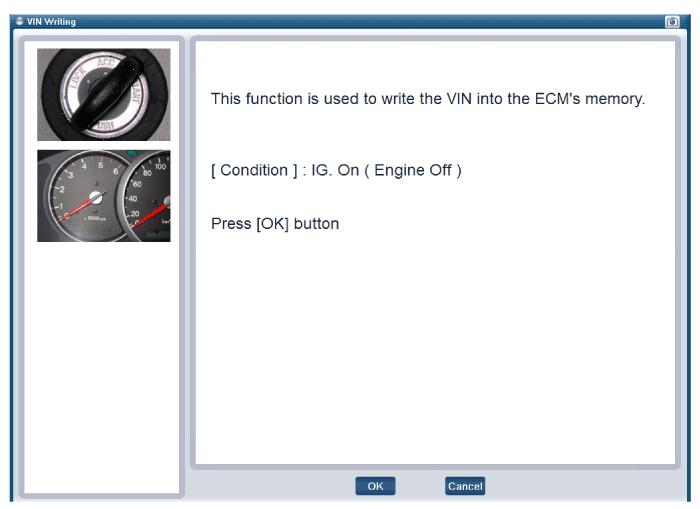
[VIN Writing 2]
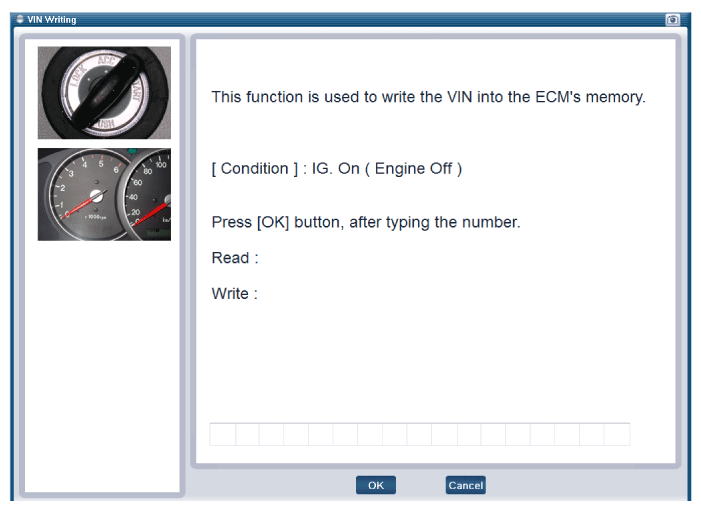
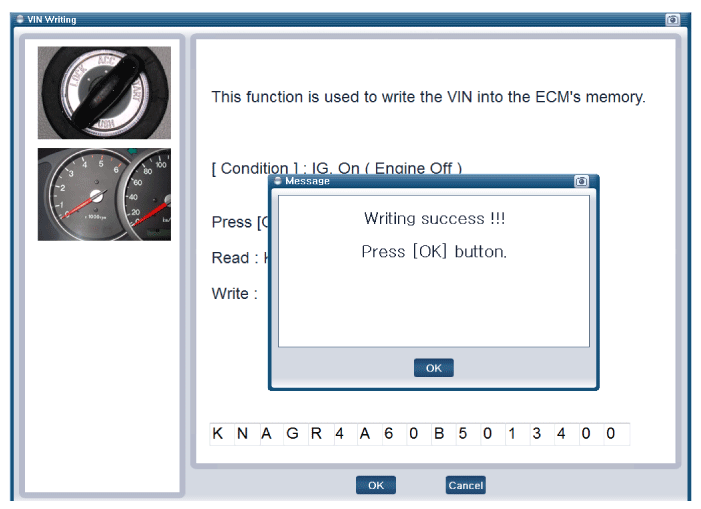
[VIN Writing 3]
 TPMS Receiver Schematic diagrams
Circuit Diagram
Hamess Connector
Pin No.
Discription
1
Battery ECU
2
Igni ...
 Steering System
...
Other information:
Kia Cee'd JD Service Manual: Components and components location
Component Location
Item
Description
SPAS
SPAS unit
(ECU)
• Calculate the parking trace of wheels
• Calculate and ask the demand angle to MDPS
• Warning and detect ...
Kia Cee'd JD Owners Manual: Elapsed time
This mode indicates the total time traveled
since the last driving time reset.
Even if the vehicle is not in motion, the
driving time keeps going while the engine
is running.
The meter’s working range is from
0:00~99:59.
Pressing the button for more
than 1
second, when the drivin ...
© 2017-2026 www.kceed.com
