Kia Cee'd: Driveshaft Assembly / TJ Joint Repair procedures
| Replacement |
|
| 1. |
Remove the Front Driveshaft.
(Refer to Driveshaft Assembly - “Front Driveshaft”)
|
| 2. |
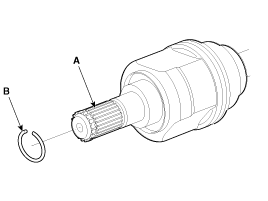
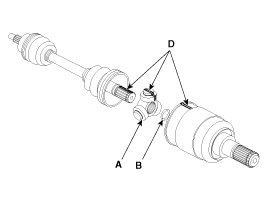
Remove the housing circlip (B) from the driveshaft spline (A).
|
| 3. |
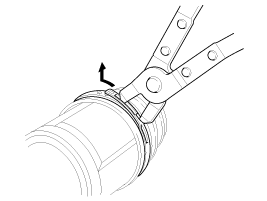
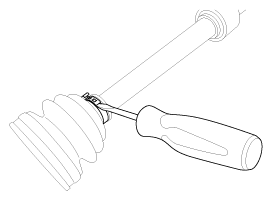
Remove both boot bands from the TJ housing.
|
| 4. |
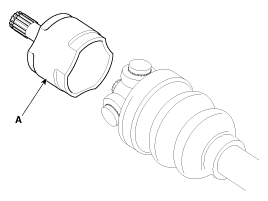
Remove the TJ housing (A).
|
| 5. |
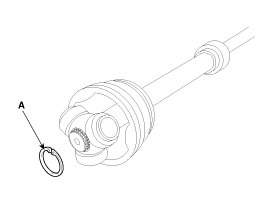
Remove the retainer ring (A) from the shaft.
|
| 6. |
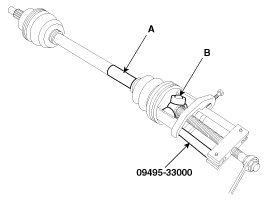
Remove the spider assembly (B) from the driveshaft (A) using the special
tool (09495-33000).
|
| 7. |
Clean the spider assembly.
|
| 8. |
Remove the TJ boot (A).
|
| Inspection |
| 1. |
Check the spider assembly for roller rotation, wear or corrosion.
|
| 2. |
Check the groove inside the joint case for wear or corrosion
|
| 3. |
Check the TJ boots for damage and deterioration.
|
| Installation |
| 1. |
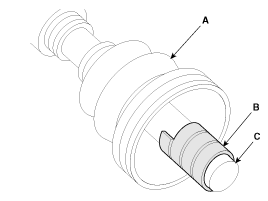
Wrap tape around the driveshaft spline(TJ) to prevent damage to the
boot.
|
| 2. |
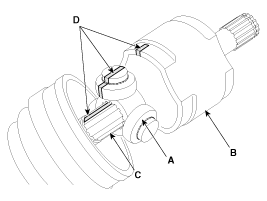
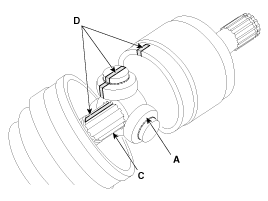
Using the alignment marks (D) made during disassembly as a guide, install
the spider assembly (A) and retainer ring (B) on the driveshaft splines
(C).
|
| 3. |
Add specified grease to the joint boot as much as it was wiped away
at inspection.
|
| 4. |
Install the both boot band.
|
| 5. |
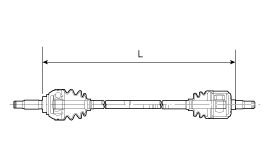
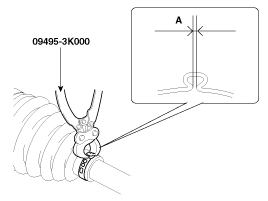
To control the air in the TJ boot, keep the specified distance between
the boot bands when they are tightened.
|
||||||||||||||||||||||||||||||||||||||||||
| 6. |
Using the SST(09495-3K000), secure the TJ boot bands.
|
| 7. |
Install the Front Driveshaft.
(Refer to Driveshaft Assembly - “Front Driveshaft”)
|
 TJ Joint Components and components location
Components
[LH]
1. BJ assembly
2. BJ circlip
3. BJ boot band
4. BJ boot
5. Shaft
6. TJ boot band
7. TJ boot
8. Sp ...
 Dynamic Damper Components and components location
Components
1. BJ
assembly
2. BJ circlip
3. BJ boot band
4. BJ boot
5. Dynamic
damper band
6. Dynamic damper
7. Shaft
8. TJ boo ...
Other information:
Kia Cee'd JD Service Manual: Relay Box (Passenger Compartment) Description and operation
Description
Smart Junction Box(SJB)
1.
General function : Interior Junction Box + some functions of BCM
It controls loads with CAN communication and IPS.
2.
Main function
–
Low speed C ...
Kia Cee'd JD Owners Manual: Pre-tensioner seat belt
Your vehicle is equipped with driver's and
front passenger's pre-tensioner seat
belts. The purpose of the pre-tensioner is
to make sure that the seat belts fit tightly
against the occupant's body in certain
frontal collisions. The pre-tensioner seat
belts may be activated in crashes wh ...


