Kia Cee'd: Tail Gate / Tail Gate Trim Repair procedures
Kia Cee'd JD Service Manual / Body (Interior and Exterior) / Tail Gate / Tail Gate Trim Repair procedures
| Replacement |
|

[Tail gate trim]
| 1. |
After loosening the mounting screws, then remove the tail gate trim
(A).
|

| 2. |
Install in the reverse order of removal.
|

[Tail gate upper trim]
| 1. |
Using a screwdriver or remover, remove the tail gate upper trim (A).
|
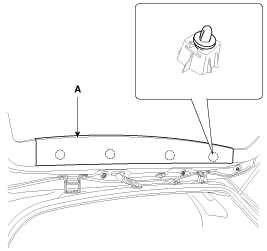
| 2. |
Install in the reverse order of removal.
|
[Tail gate side trim]
| 1. |
Remove the tail gate trim.
|
| 2. |
Remove the tail gate upper trim.
|
| 3. |
After loosening the mounting screws, then remove the tail gate side
trim (A).
|
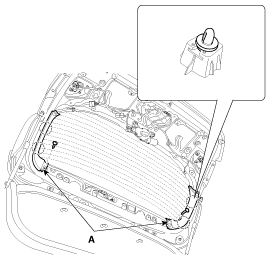
| 4. |
Install in the reverse order of removal.
|
 Tail Gate Trim Components and components location
Component Location
1. Tail gate trim
...
 Tail Gate Latch Components and components location
Component Location
1. Tail gate latch assembly
...
Other information:
Kia Cee'd JD Owners Manual: Trip computer
The trip computer is a microcomputercontrolled
driver information system that
displays information related to driving
when the ignition switch is in the ON
position. All stored driving information
(except odometer, distance to empty and
instant fuel economy) resets if the battery
is ...
Kia Cee'd JD Owners Manual: Speed limiter indicator
The indicator illuminates when the speed
limit control system is enabled by move
the lever up on the steering wheel.
The indicator goes off when the
lever
up again to deactivate the system.
If there is a problem with the speed limit
control system, the “---” indicator will blink. ...
© 2017-2026 www.kceed.com
