Kia Cee'd: Roof Trim / Roof Trim Assembly Repair procedures
| Replacement |
|

|

| 1. |
Remove the rear seat assembly.
(Refer to Rear Seat - "Rear Seat Assembly")
|
| 2. |
Remove the front pillar trim.
(Refer to Interior Trim - "Front Pillar Trim")
|
| 3. |
Remove the canter pillar upper trim.
(Refer to Interior Trim - "Center Pillar Trim")
|
| 4. |
Remove the luggage side trim.
(Refer to Interior Trim - "Luggage Side Trim")
|
| 5. |
Remove the rear pillar trim.
(Refer to Interior Trim - "Rear Pillar Trim")
|
| 6. |
Remove the sunvisor and retainer.
(Refer to Roof Trim - "Sunvisor")
|
| 7. |
Remove the assist handle.
(Refer to Roof Trim - "Assist Handle")
|
| 8. |
Remove the overhead console lamp.
|
| 9. |
Remove the room lamp. [General type]
|
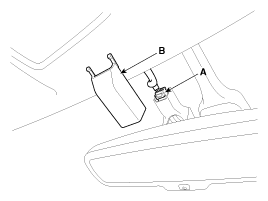
| 10. |
Remove the ECM mirror cover (B).
|
| 11. |
Disconnect the ECM mirror connector (A).
|
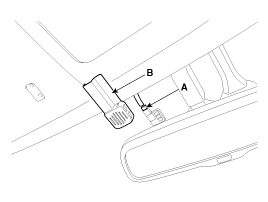
| 12. |
Remove the auto defog sensor cover (B).
|
| 13. |
Disconnect the auto defog sensor connector (A).
|
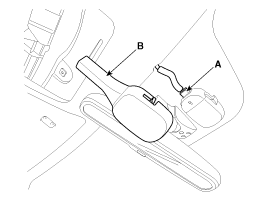
| 14. |
Remove the rain sensor cover (B).
|
| 15. |
Disconnect the rain sensor connector (A).
|
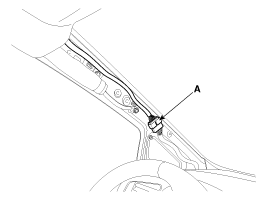
| 16. |
Disconnect the roof trim main connector (A) and the mounting clips in
the front pillar.
|
| 17. |
Disconnect the roof antenna connector (A) and the mounting clips in
the front pillar.
|

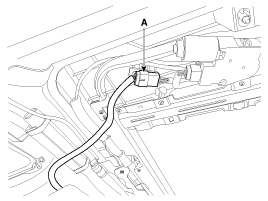
| 18. |
Disconnect the roof antenna connector (A).
|
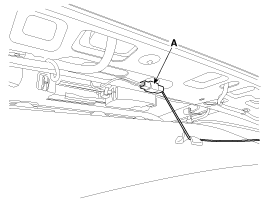
| 19. |
Disconnect the panoramaroof motor connector (A).
|
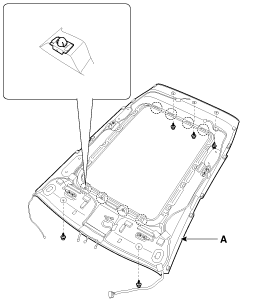
| 20. |
Detach the clips, then remove the roof trim assembly (A).
|
| 21. |
Remove the vanity lamp.
|
| 22. |
Remove the hands free mic.
|
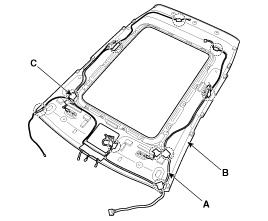
| 23. |
Remove roof trim wiring harness (A) from the roof trim (B).
|

| 24. |
Install in the reverse order of removal.
|
 Roof Trim Assembly Components and components location
Component Location
1. Roof Trim Assembly
...
 Interior Trim
...
Other information:
Kia Cee'd JD Service Manual: Side Airbag (SAB) Module Description and operation
Description
The Side Airbags (SAB) are installed inside the front seat and protects the
driver and passenger from danger when side crash occurs. The SRSCM determines
deployment of side airbag by using Side Impact Sensor (SIS) signal.
...
Ford Escape 2020-2025 Owners Manual: Fuel Tank Capacity. Fuel and Refueling – Troubleshooting
Fuel Tank Capacity
Advertised Capacity
The advertised capacity is the maximum
amount of fuel that you can add to the fuel
tank when the fuel gauge indicates empty.
In addition, the fuel tank contains an empty
reserve. The empty reserve is an
unspecified amount of fuel that remains
in the fuel t ...
