Kia Cee'd: Front Axle Assembly / Front Hub / Knuckle / Repair procedures
Kia Cee'd JD Service Manual / Driveshaft and axle / Front Axle Assembly / Front Hub / Knuckle / Repair procedures
| Replacement |
| 1. |
Loosen the wheel nuts slightly.
Raise the vehicle, and make sure it is securely supported.
|
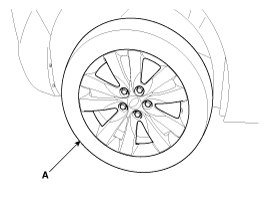
| 2. |
Remove the front wheel and tire (A) from front hub .
|

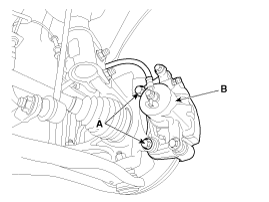
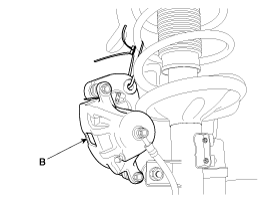
| 3. |
Remove the brake caliper mounting bolts (A), and then place the brake
caliper assembly (B) with wire.
|
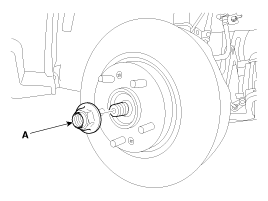
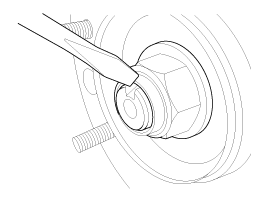
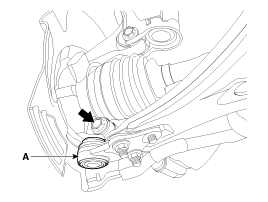
| 4. |
Remove driveshaft caulking nut (A) from the front hub under applying
the brake.
|
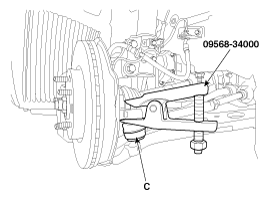
| 5. |
Remove the tie rod end ball joint (C) from the knuckle by using the
SST (09568-34000).
|
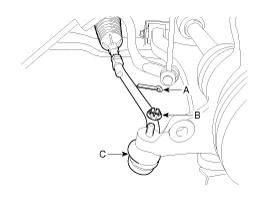
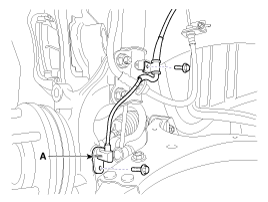
| 6. |
Remove the wheel speed sensor(A).
|
| 7. |
Remove the lower arm (A) from the knuckle.
|
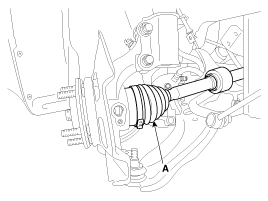
| 8. |
Disconnect the driveshaft (A) from the front hub assembly.
|
| 9. |
Loosen the knuckle upper mounting bolts and then remove the knuckle
assembly (A).
|
| Disassembly |
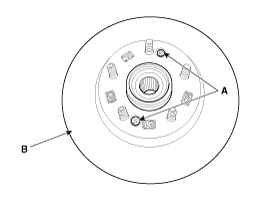
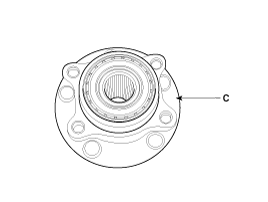
| 1. |
Loosen the mounting screws (A-2ea) and then remove the brake disc (B)
from the hub.
|
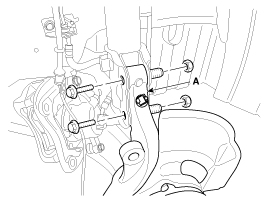
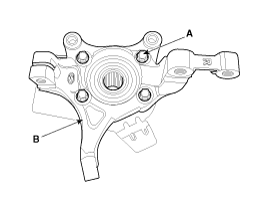
| 2. |
Loosen the bolts (A-4ea) and then remove the knuckle (B) from the hub
(C).
|
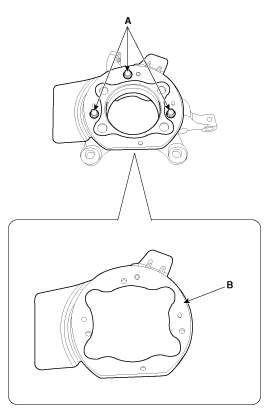
| 3. |
Loosen the bolts (A-3ea) and then remove the dust cover (B) from the
knuckle.
|
| 4. |
Reassembly in the reverse order of disassembly.
|
| Inspection |
| 1. |
Check the hub for cracks and the splines for wear.
|
| 2. |
Check the knuckle for cracks.
|
| 3. |
Check the bearing for cracks or damage.
|
| 4. |
Pad surface of brake assembly and sliding surface of brake disc must
be free from grease, oil, rust and other foreign substances.
|
| Installation |
| 1. |
Install in the reverse order of removal.
|

 Components and components location
Components
1. Tire
2. Drive shaft coking nut
3. Brake disc
4. Dust cover
5. Wheel hub assembly
6. Knuckle
...

Other information:
Kia Cee'd JD Service Manual: Components and components location
Components
1. Tire
2. Drive shaft coking nut
3. Brake disc
4. Dust cover
5. Wheel hub assembly
6. Knuckle
...
Kia Cee'd JD Owners Manual: Key operations
Used to start the engine.
Used to lock and unlock the doors.
WARNING
We recommend that you use parts
for replacement from an authorized
Kia dealer. If an aftermarket key is
used, the ignition switch may not
return to ON after START. If this
happens, the starter will continue
to ...
© 2017-2025 www.kceed.com
