Kia Cee'd: Crash Pad / Main Crash Pad Assembly Repair procedures
Kia Cee'd JD Service Manual / Body (Interior and Exterior) / Crash Pad / Main Crash Pad Assembly Repair procedures
| Replacement |
|
|
| 1. |
Remove the front pillar trim.
(Refer to Interior Trim - "Front Pillar Trim")
|
| 2. |
Remove the cowl side trim.
(Refer to Interior Trim - "Cowl Side Trim")
|
| 3. |
Remove the cluster fascia upper panel.
(Refer to Crash Pad - "Cluster Fascia Panel")
|
| 4. |
Remove the instrument cluster.
|
| 5. |
Remove the audio unit.
|
| 6. |
Remove the crash pad center lower panel.
(Refer to Crash Pad - "Crash Pad Center Panel")
|
| 7. |
Remove the steering wheel.
|
| 8. |
Remove the multifunction switch assembly.
|
| 9. |
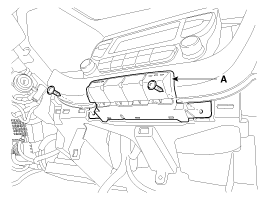
After loosening the mounting screws, then remove the center swtich (A).
|
| 10. |
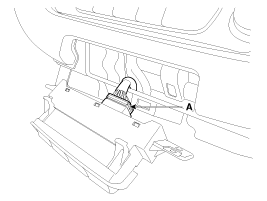
Disconnect the center swtich connector (A).
|
| 11. |
Using a screwdriver or remover, remove the multi display facia panel
(A).
|
| 12. |
Disconnect the multi display facia panel connector (A).
|
| 13. |
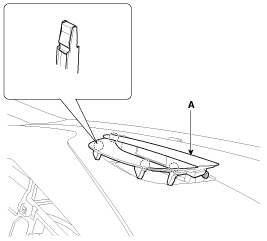
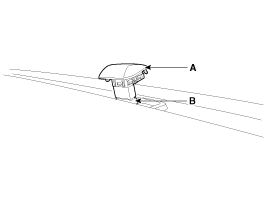
Using a screwdriver or remover, remove the photo sensor (A).
|
| 14. |
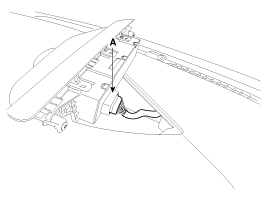
Disconnect the photo sensor connector (B).
|
| 15. |
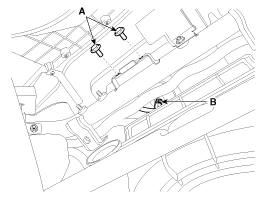
Loosen the mounting bolts (A).
|
| 16. |
Disconnect the passenger's airbag connector (B).
|
| 17. |
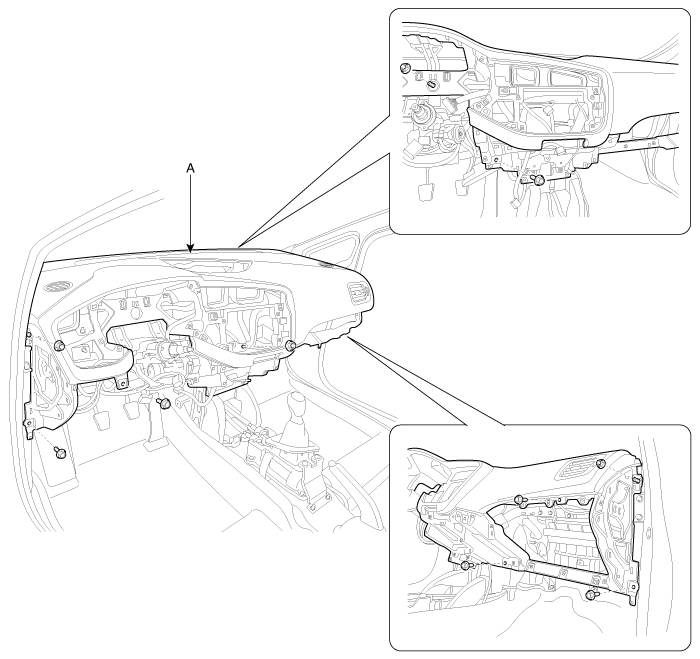
After loosening the mounting bolts and nuts, then remove the main crash
pad assembly (A).
|
| 18. |
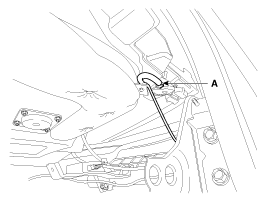
Right before removing the main crash pad, slightly lift the main crash
pad and remove the twitter speaker connector and mounting clip (A) located
at the end of both side.
|
| 19. |
Install in the reverse order of removal.
|
 Main Crash Pad Assembly Components and components location
Component Location
1. Main crash pad assembly
...
 Cowl Cross Bar Assembly Components and components location
Component Location
1. Cowl cross bar assembly
...
Other information:
Ford Escape 2020-2025 Owners Manual: Adjusting the Seatbelt Height
WARNING: Position the seatbelt
height adjuster so that the seatbelt rests
across the middle of your shoulder.
Failure to adjust the seatbelt correctly
could reduce its effectiveness and
increase the risk of injury in a crash.
Press the button and slide the height
adjuster up or down.
Rele ...
Kia Cee'd JD Service Manual: Specifications
Specification
Ignition System
Ignition Coil
Item
Specification
Primary Coil Resistance (Ω)
0.75 ± 15% [20°C (68°F)]
Secondary Coil Resistance (kΩ)
5.9 [20°C (68°F)] ...
© 2017-2025 www.kceed.com


