Kia Cee'd: Lighting System / License Lamp Repair procedures
Kia Cee'd JD Service Manual / Body Electrical System / Lighting System / License Lamp Repair procedures
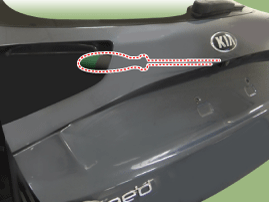
| Removal |
| [5Door] |
| 1. |
Disconnect the negative (-) battery terminal.
|
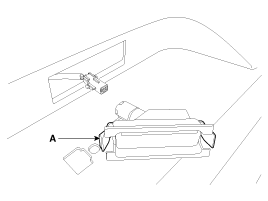
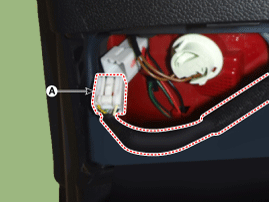
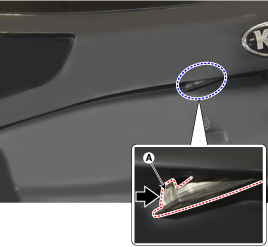
| 2. |
Remove the license lamp assembly after pushing the fixing clip (A).
|
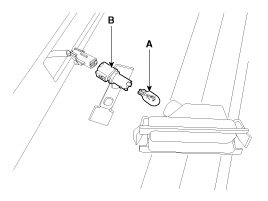
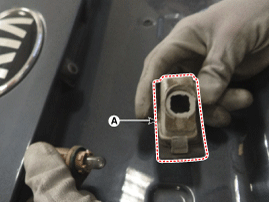
| 3. |
Replace the bulb (A) after removing the bulb socket (B).
|
| [Wagon] |
| 1. |
Disconnect the negative (-) battery terminal.
|
| 2. |
Using a screwdriver or remover, remove the rear combination lamp cover
(A).
|
| 3. |
Disconnect the rear combination lamp connector (A).
|
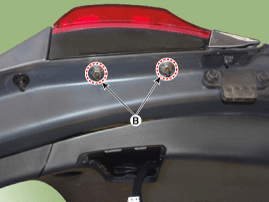
| 4. |
Loosen the rear combination lamp mounting nuts (A).
|
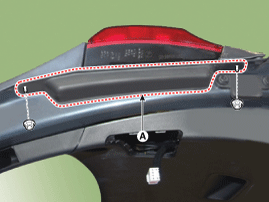
| 5. |
Remove the cover (A) after loosening the mounting nuts.
|
| 6. |
Remove the rear combination lamp (A) after loosening the mounting nuts
(B).
|

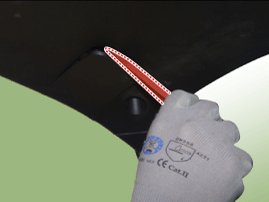
| 7. |
Using the torch find the small clip (A) holding the number plate light
in its position.
|
| 8. |
With suitable and long enough screw driver press this clip gently and
the light will jump out of position.
|
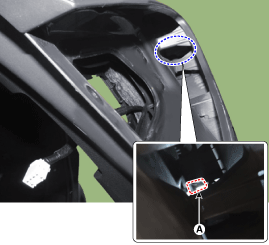
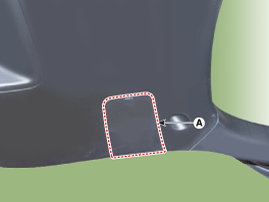
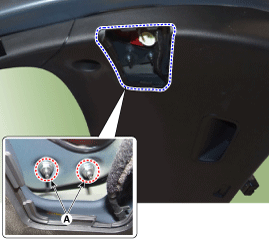
| 9. |
Remember that screw driver (A) has to be long enough to reach through
the hole in the tail gate to the light clip inside.
|

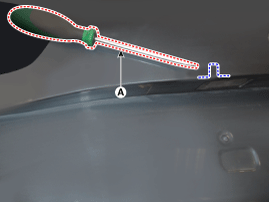
| 10. |
With the screw driver press the clip (A).
|
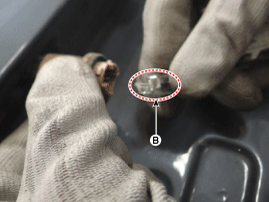
| 11. |
Remove the license lamp bulb (B) after removing the license lamp socket
(A).
|
| Installation |
| [5Door] |
| 1. |
Install the bulb and connect the connector.
|
| 2. |
Install the license lamp.
|
| [Wagon] |
| 1. |
Install the license lamp bulb and socket.
|
| 2. |
Connect the license lamp connector.
|
| 3. |
Install the rear combination lamp.
|
| 4. |
Connect the rear combination lamp connector.
|
| 5. |
Install the rear combination lamp cover.
|
| 6. |
Connect the negative (-) battery terminal.
|
 Overhead Console Lamp Repair procedures
Inspection
1.
Remove the overhead console lamp assembly then check for continuity
between terminals. If the continuity is not as specified, replace the
map l ...
 Hazard Lamp Switch Repair procedures
Inspection
1.
It will be able to diagnose defects of hazard switch with GDS quickly.
GDS can operates actuator forcefully, input/output value monitoring
and ...
Other information:
Kia Cee'd JD Service Manual: Troubleshooting
Troubleshooting
Problem Symptoms Table
Use the table below to help you find the cause of the problem. The numbers indicate
the priority of the like cause of the problem. Check each part in order.
If necessary, replace these parts.
Symptom ...
Kia Cee'd JD Owners Manual: Important - use of compact spare tire
Your vehicle is equipped with a compact
spare tire. This compact spare
tire takes up less space than a regular-
size tire. This tire is smaller than a
conventional tire and is designed for
temporary use only.
CAUTION
You should drive carefully
when the compact spare is in
use. T ...
© 2017-2026 www.kceed.com
