
Kia Cee'd: Intake And Exhaust System / Intake Manifold Repair procedures
Kia Cee'd JD Service Manual / Engine Mechanical System / Intake And Exhaust System / Intake Manifold Repair procedures
| Removal and Installation |
| 1. |
Remove the engine cover.
|
| 2. |
Disconnect the battery negative terminal.
|
| 3. |
Remove the air cleaner assembly.
(Refer to Intake And Exhaust System-"Air Cleaner")
|
| 4. |
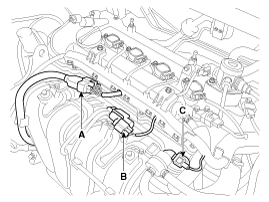
Disconnect the injector extension connector (A), the VIS (Variable intake
system) connector (B) and the PCSV (Purge control solenoid valve) connector
(C).
|
| 5. |
Disconnect the ETC (Electronic throttle control) connector (A) and the
MAPS (Manifold absolute pressure sensor) connector (B).
(Refer to Fuel System - "ETC System")
|
| 6. |
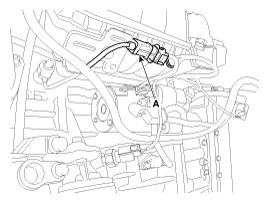
Disconnect the knock sensor connector (A).
|
| 7. |
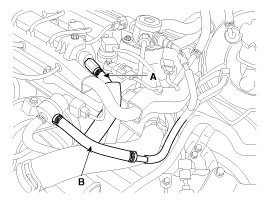
Disconnect the PCV (Positive crankcase ventilation) hose (A) and the
PCSV (Purge control solenoid valve) hose (B).
|
| 8. |
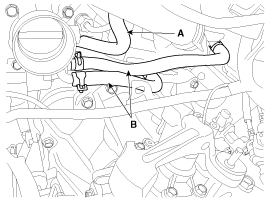
Disconnect the vacuum hose (A) and the throttle body coolant hoses (B).
|
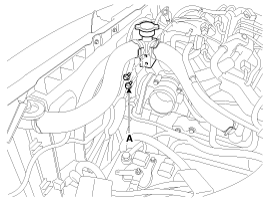
| 9. |
Unfasten the filler neck assembly mounting bolts (A).
|
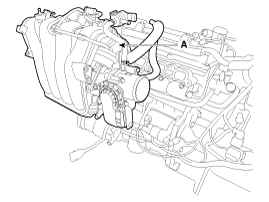
| 10. |
Remove the intake manifold (A) with the gasket.
|

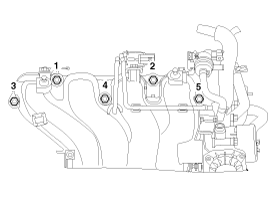
| 11. |
Install in the reverse order of removal.
|
 Intake Manifold Components and components location
Components
1. Intake manifold assembly
2. Intake manifold gasket
3. Electronic throttle body gasket
4. Electronic throttle body
5. Bracket
...
 Exhaust Manifold Components and components location
Components
1. Heat protector
2. Exhaust manifold
3. Gasket
4. Exhaust manifold stay
...
Other information:
Kia Cee'd JD Owners Manual: Underbody maintenance
Corrosive materials used for ice and
snow removal and dust control may collect
on the underbody. If these materials
are not removed, accelerated rusting can
occur on underbody parts such as the
fuel lines, frame, floor pan and exhaust
system, even though they have been
treated with rus ...
Kia Cee'd JD Service Manual: Camshaft Repair procedures
Removal
1.
Remove the cylinder head cover.
(Refer to Cylinder Head Assembly - "Cylinder Head Cover")
2.
Remove the timing chain cover.
(Refer to Timing System - "Timing Chain Cover")
...
© 2017-2026 www.kceed.com
