Kia Cee'd: Intake And Exhaust System / Exhaust Manifold Repair procedures
Kia Cee'd JD Service Manual / Engine Mechanical System / Intake And Exhaust System / Exhaust Manifold Repair procedures
| Removal and Installation |
| 1. |
Remove the engine cover.
|
| 2. |
Disconnect the battery negative terminal.
|
| 3. |
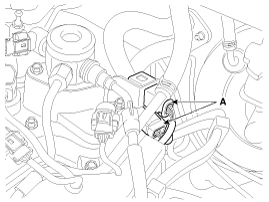
Disconnect the front and rear oxygen sensor connectors (A).
|
| 4. |
Remove the front muffler.
(Refer to Intake And Exhaust System - "Muffler")
|
| 5. |
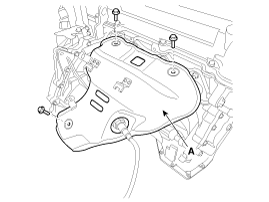
Remove the heat protector (A).
|
| 6. |
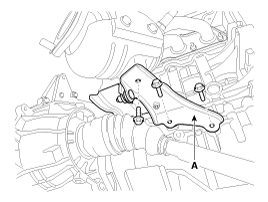
Remove the exhaust manifold stay (A).
|
| 7. |
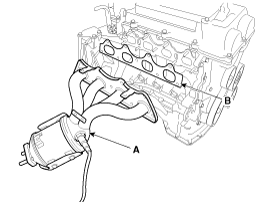
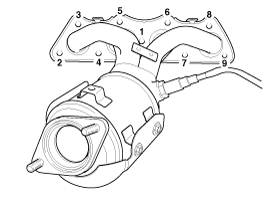
Remove the exhaust manifold (A) and gasket.
|
| 8. |
Install in the reverse order of removal.
|
 Exhaust Manifold Components and components location
Components
1. Heat protector
2. Exhaust manifold
3. Gasket
4. Exhaust manifold stay
...
 Muffler Components and components location
Components
1.
Front muffler
2. Gasket
3.
Hanger
4. Center & main muffler
...
Other information:
Kia Cee'd JD Service Manual: Components and components location
Component Location
1. Cowl top cover
...
Kia Cee'd JD Service Manual: Components and components location
Component Location
1. Panoramaroof
2. Panoramaroof switch
3. Panoramaroof motor & controller
4. Roller blind motor & slave controller
...
© 2017-2025 www.kceed.com


