Kia Cee'd: Adaptive Front Lighting System / Repair procedures
Kia Cee'd JD Service Manual / Body Electrical System / Adaptive Front Lighting System / Repair procedures
| Inspection |
Initialization and diagnosis sequence by using diagnostic equipment
Below content summarize the procedure for A/S using Diagnostic equipment
Download Parameter
| 1. |
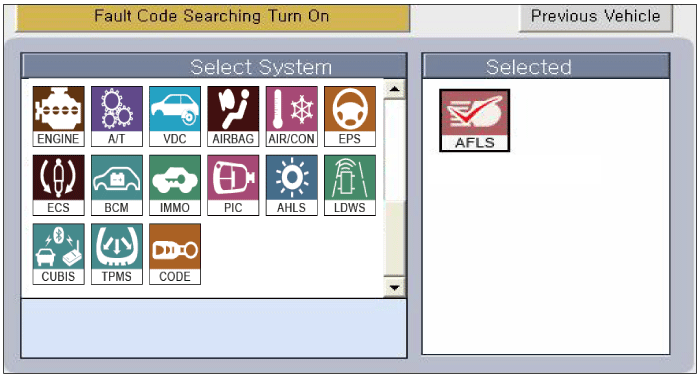
Select "AFLS" menu after selecting a vehicle.
|
| 2. |
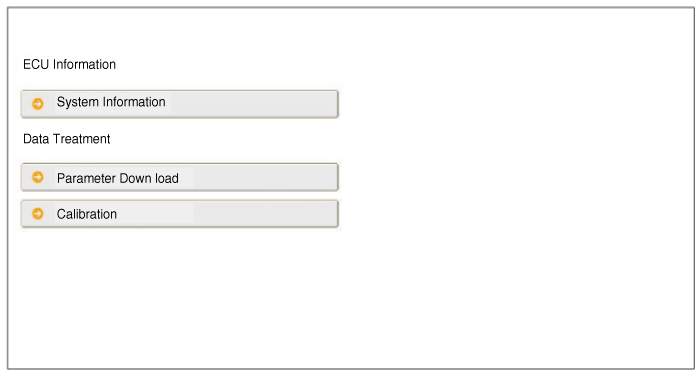
Select "Parameter download" menu for define a characteristc of vehicle.
|
| 3. |
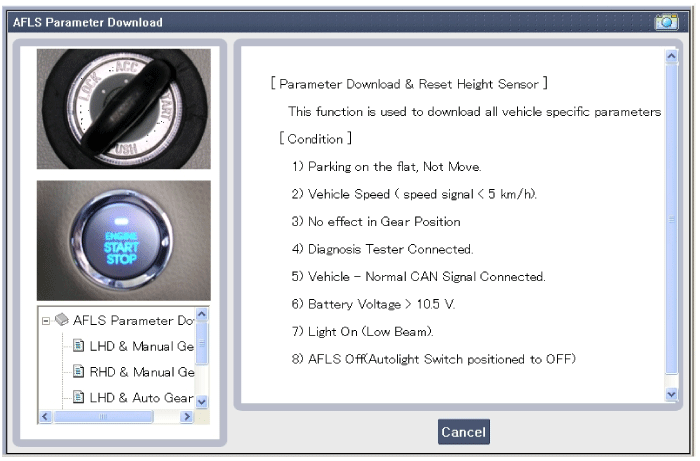
Select the LHD/RHD and MT/AT option refer to the vehicle options.
|
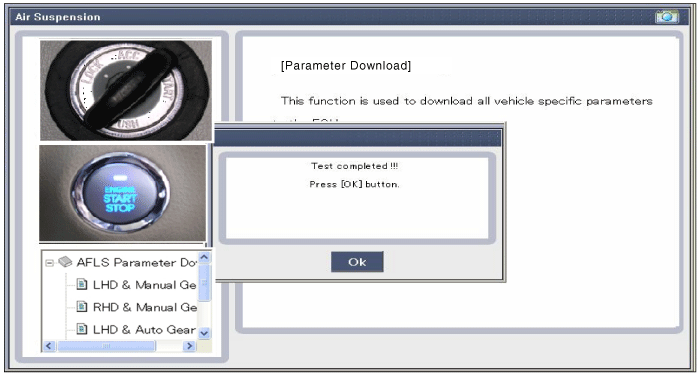
| 4. |
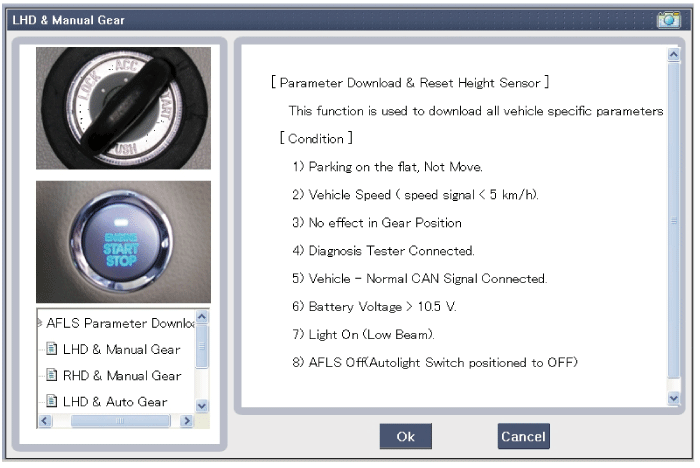
When "Parameter download" is done,display belows.
|
System Calibration
This menu is applied only if vehicle has a Steel suspension
|
| 1. |
Select "AFLS" menu after selecting a vehicle.
|
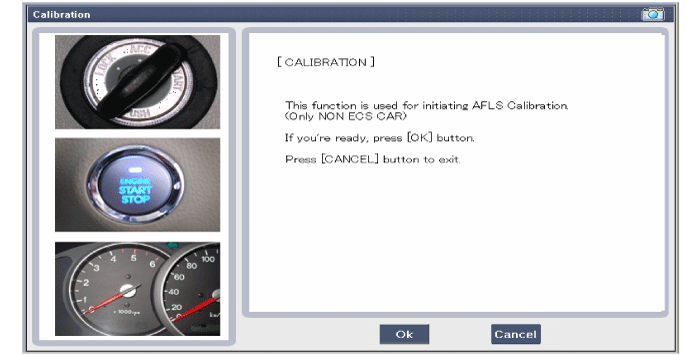
| 2. |
Select "Sensor initializing-Non ECS" if vehicle has a Steel suspension
|
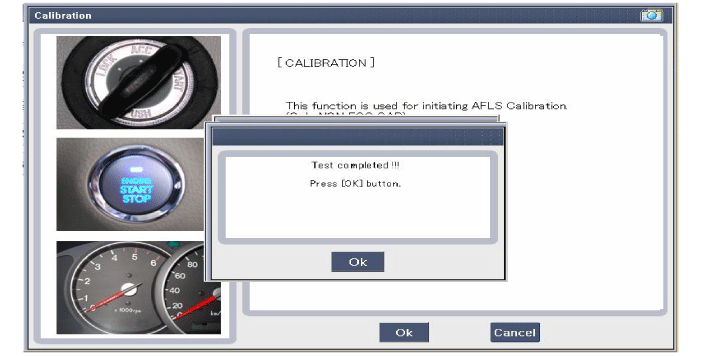
| 3. |
When "System calibration" is done,display belows.
|
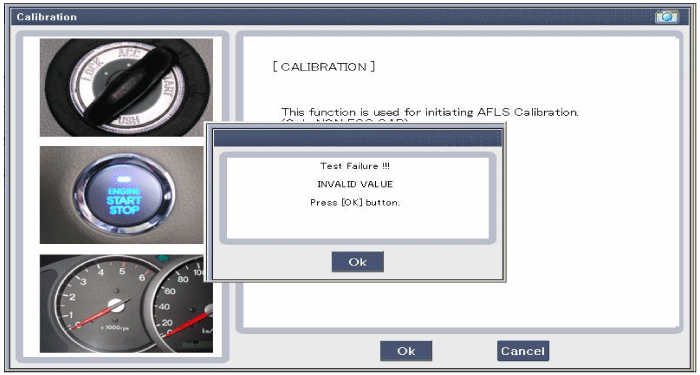
| 4. |
When "System calibration" is not done,display as belows.
|
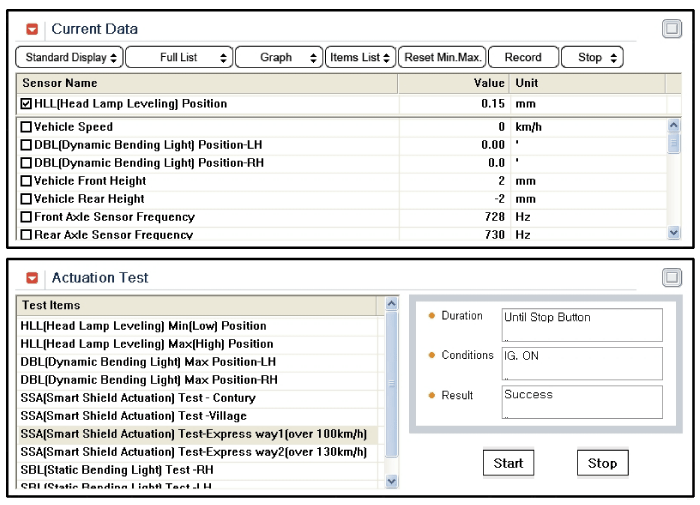
Actuator Test
When it replace H/Lamp Unit, it necessarily check up by operating actuator test.
| 1. |
Select "AFLS" menu after selecting a vehicle.
|
| 2. |
Select "Actuator test"
|
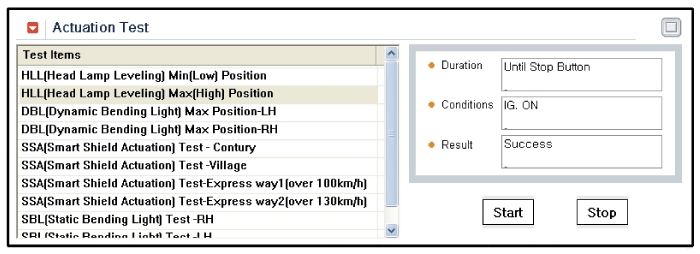
| 3. |
Select DBL or HLL test by using "Start" button.
|
| 4. |
In case select DBL or HLL ACTUATOR DRIVE TO MAX POS(swivelling)
In case select "Start" button : drive to max position right direction
(15°)
In case select another item : back to initial position
|
AFLS Fail-safe Function
If the error condition of AFLS occurred during system operation, the system
have to fail-safe reaction for prevent dazzling of opposite side driver
AFLS Fail-safe Index
|
Part |
Content |
Fail-safe Reaction |
Tell-tale Result |
|||
|
ECU |
ECU Hardware (A/D Converter fail) |
1) Levelling : staying in current POS 2) Swivelling : staying in current POS |
- |
|||
|
ECU Software (EEPROM/ROM fail) |
1) Levelling : staying in current POS 2) Swivelling : staying in current POS |
|||||
|
Control Unit not initialized Calibration not performed |
1) Levelling : drive to error POS (H-15) 2) Swivelling : drive to error POS (0°) |
|||||
|
Levelling module fault |
Right |
Short circuit |
1) Right Levelling : staying in current POS 2) Left Levelling : normal operation 3) Swivelling : Normal operation |
- |
||
|
Over temperature |
||||||
|
LIN communication error |
1) Right Levelling: staying in current POS(Before), drive to error POS
2) Left Levelling: normal operation 3) Swivelling : normal operation |
|||||
|
Left |
Short circuit |
1) Left Levelling : staying in current POS 2) Right Levelling : normal operation 3) Swivelling : Normal operation |
- |
|||
|
Over temperature |
||||||
|
LIN communication error |
1) Right Levelling: normal operation 2) Left Levelling: staying in current POS(Before), drive to error POS 3) Swivelling : normal operation |
|||||
|
Swivelling module fault |
Right |
Short circuit |
1) Right Swivelling : staying in current POS 2) Left Swivelling : drive to error POS 3) Right Levelling : drive to error POS 4) Left Levelling : Normal operation |
Tell-tale |
||
|
Over temperature |
||||||
|
Stall detected |
||||||
|
LIN coummunication |
LIN fault |
Before |
1) Swivelling : staying in current POS 2) Lefvelling : drive to error POS |
|||
|
After |
1) Swivelling : drive to error POS 2) Lefvelling : drive to error POS |
|||||
|
DBL supply fault |
Before |
1) Swivelling : staying in current POS 2) Lefvelling : drive to error POS |
||||
|
After |
1) Right Swivelling : staying in current POS 2) Left Swivelling : drive to error POS 3) Lefvelling : drive to error POS |
|||||
|
|
Left |
Short circuit |
1) Left Swivelling : staying in current POS 2) Right Swivelling : drive to error POS 3) Left Levelling : drive to error POS 4) Right Levelling : Normal operation |
Tell-tale |
||
|
Over temperature |
||||||
|
Stall detected |
||||||
|
LIN coummunication |
LIN fault |
Before |
1) Swivelling : staying in current POS 2) Lefvelling : drive to error POS |
|||
|
After |
1) Swivelling : drive to error POS 2) Lefvelling : drive to error POS |
|||||
|
DBL supply fault |
Before |
1) Swivelling : staying in current POS 2) Lefvelling : drive to error POS |
||||
|
After |
1) Left Swivelling : staying in current POS 2) Right Swivelling : drive to error POS 3) Lefvelling : drive to error POS |
|||||
|
AXLE sensor |
Front & Rear |
external(5V) Sensor power supply fault (short to ground or to Bat) |
1) Levelling : drive to error POS 2) Swivelling : Normal operation |
- |
||
|
Front |
FREQ_LOWER , FREQ_UPPER |
1) Levelling : drive to error POS 2) Swivelling : Normal operation |
||||
|
Signal line open circuit |
1) Levelling : drive to error POS 2) Swivelling : Normal operation |
|||||
|
Signal line short circuit |
||||||
|
Front sensor out of range |
||||||
|
Front sensor out of range |
FREQ_LOWER , FREQ_UPPER |
1) Levelling : drive to error POS 2) Swivelling : Normal operation |
||||
|
Signal line open circuit |
1) Levelling : drive to error POS 2) Swivelling : Normal operation |
|||||
|
Signal line short circuit |
||||||
|
Front sensor out of range |
||||||
|
Battery |
battery voltage too high |
1) Levelling: staying in current POS(Before), drive to error POS 2) Swivelling : staying in current POS(Before), drive to error POS |
- |
|||
|
battery voltage too low |
1) Levelling: staying in current POS(Before), drive to error POS 2) Swivelling : staying in current POS(Before), drive to error POS |
|||||
|
LIN physical fault |
Short circuit to battery or GND (physical fault) |
Before |
1) Levelling : staying in current POS 2) Swivelling : staying in current POS |
Tell-tale |
||
|
After |
1) Levelling : drive to error POS 2) Swivelling : drive to error POS |
|||||
|
CAN communication fault |
Speed signal fault |
speed signal invalid |
1) Levelling : Medium dynamic mode 2) Swivelling : drive to error POS |
- |
||
|
supplying ECU not available on CAN |
||||||
|
Steering angle signal fault |
Steering wheel sensor not O.K (signal invalid) |
1) Levelling : normal operation 2) Swivelling : drive to error POS |
- |
|||
|
supplying ECU not available on CAN |
||||||
|
Gearbox signal fault |
Reverse gear signal invalid |
1) Levelling : normal operation 2) Swivelling : drive to error POS |
- |
|||
|
supplying ECU not available on CAN |
||||||
|
Accelator pedal signal fault |
Accelator pedal signal invalid |
1) Levelling : Medium dynamic mode 2) Swivelling : Normal operation |
- |
|||
|
supplying ECU not available on CAN |
||||||
|
Engine state signal fault |
Engine state signal invalid |
1) Levelling : Normal operation, no operation(Before) 2) Swivelling : Normal operation, no operation(Before) |
- |
|||
|
supplying ECU not available on CAN |
||||||
|
Yaw rate signal fault |
Yaw rate signal invalid |
1) Levelling : Normal no operation(Before) 2) Swivelling : Reduced performance |
- |
|||
|
supplying ECU not available on CAN |
||||||
|
Brake pedal signal fault |
Brake signal invalid |
1) Levelling : Medium dynamic mode 2) Swivelling : Normal operation |
- |
|||
|
supplying ECU not available on CAN |
||||||
|
|
CAN 'Bus off' fault |
ECU is isolated from the CAN network |
Air suspension |
1) Swivelling : drive to error POS 2) Levelling : drive to error POS |
- |
|
|
Steel suspension |
1) Swivelling : drive to error POS 2) Levelling : slow dynamic mode |
|||||
|
Lamp unction Signal Fault |
Supplying ECU not available on CAN |
1) Levelling : Normal operation 2) Swivelling : Normal operation |
- |
|||
AFLS Setting Procedure
When it replace AFLS ECU or H/Lamp Unit or Height sensor, it operates in setting
procedure by using Diagnostic equipment following belows.
When AFLS setting procedure operate, necessarily confirm suspension type and
then download parameter.
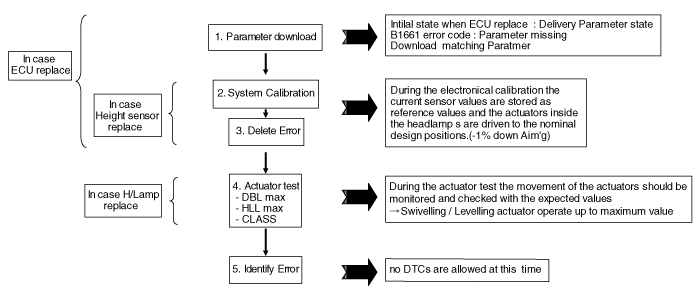
※ DTC : Diagnostic Trouble Code
DBL : Dynamic bending Light
HLL : Head Lamp Leveling
Vehicle Condition While AFLS Setting
| 1. |
Vehicle on an even surface
|
| 2. |
No vehicle movement
|
| 3. |
Gear position in P & N
|
| 4. |
Ignition switched on & Engine RPM >500RPM
|
| 5. |
Diagnostic equipment connected
|
| 6. |
ALL ECUs on CAN mounted and activated
|
| 7. |
Battery voltage > 10.5 V ( ECU supply to be ensured)
|
| 8. |
Light switched
|
| 9. |
AFLS ON or OFF
|
Action In Case Of Download Wrong Parameter
| 1. |
Download Delivery Parameter
|
| 2. |
Check up B1661(Parameter missing)
|
| 3. |
Ignition OFF
|
| 4. |
Ignition ON & Engine RPM > 500RPM
|
| 5. |
Download matching Paratmer
|
 Description and operation
Description
Adaptive Front-lighting System (AFLS)
AFLS(Adaptive Front-lighting System)is a headlamp orientation control system
that takes into account both steering angle and ...
 Adaptive Front Lighting System Description and operation
Description
AFLS Unit(ECU)
AFLS located in Cockpit Module is provided information of vehicle (steering
wheel signal,vehicle speed, inclination of vehicle).
Based on provide ...
Other information:
Kia Cee'd JD Owners Manual: 2. Select parking assist mode
Select the parking assist mode by pressing
the Smart Parking Assist System
button with the shift lever in N (Neutral)
or D(Drive) and the brake pedal
depressed. If the speed of the vehicle
has not exceeded 5km/h with the IGN in
ON, move the shift lever to N(Neutral) to
sele ...
Kia Cee'd JD Owners Manual: Speed limiter indicator
The indicator illuminates when the speed
limit control system is enabled by move
the lever up on the steering wheel.
The indicator goes off when the
lever
up again to deactivate the system.
If there is a problem with the speed limit
control system, the “---” indicator will blink. ...
© 2017-2026 www.kceed.com


