Kia Cee'd: Fuses and Relays / Relay Box (Passenger Compartment) Repair procedures
| Fuse Inspection |
| 1. |
Be sure there is no play in the fuse holders, and that the fuses are
held securely.
|
| 2. |
Be sure the fuse capacities for each circuit correct.
|
| 3. |
Check whether or not the fuse is broken.
If a fuse is to be replaced, be sure to use a new fuse of the same capacity.
Always determine why the fuse blew first and completely eliminate the
problem before installing a new fuse.
|

| Inspection |
| 1. |
The SJB can be diagnosed by using the GDS. The SJB communicates with
the GDS which then displays inputs and outputs along with codes.
|
| 2. |
To diagnose the SJB function, select the vehicle model, BCM and SJB.
|
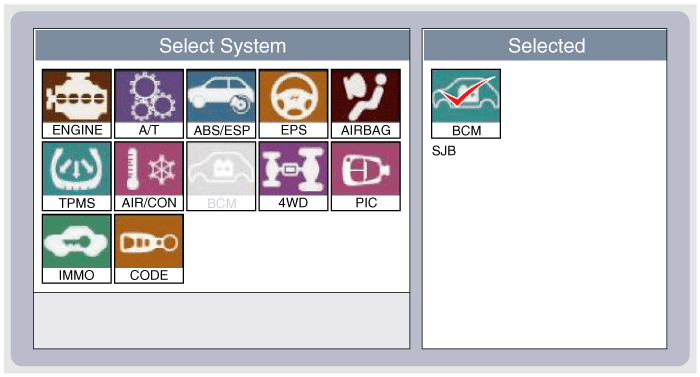
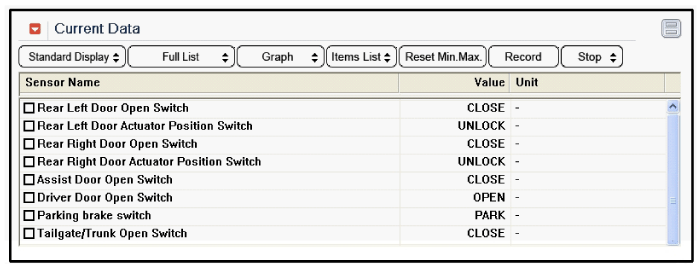
| 3. |
To consult the present input/out value of SJB, "Current DATA". It provides
information of SJB input/output conditions.
|
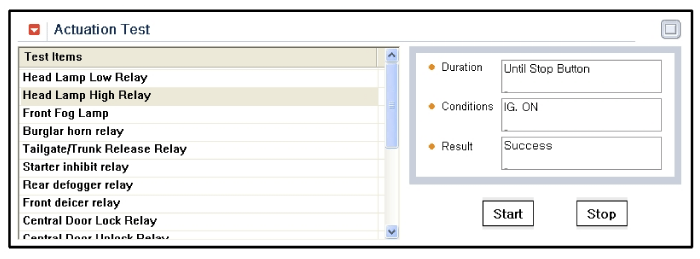
| 4. |
To perform functional test on SJB outputs, select "Actuation Test"
|
| Removal |
| 1. |
Disconnect the negative (-) battery terminal.
|
| 2. |
Remove the crash pad lower panel.
(Refer to Body - "Crash Pad Lower Panel")
|
| 3. |
Disconnect the connectors from the fuse side of the smart junction box.
|
| 4. |
Remove the smart junction box after loosening the mounting nuts and
bolt.
|
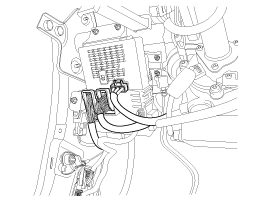
| 5. |
Disconnect the connectors from the back side of the smart junction box.
|
| Installation |
| 1. |
Install the smart junction box.
|
| 2. |
Install the crash pad lower panel.
|
| 3. |
Check that all system operates normally.
|
 Relay Box (Passenger Compartment) Description and operation
Description
Smart Junction Box(SJB)
1.
General function : Interior Junction Box + some functions of BCM
It controls loads with CAN communication and IP ...
 ICM (Integrated Circuit Module) Relay Box Components and components location
Component Location
...
Other information:
: Replacing a Lost Key or Remote Control. Programming the Remote Control. Keys
and Remote Controls – Troubleshooting
Replacing a Lost Key or Remote Control
You can purchase replacement keys or
remote controls from an authorized dealer.
Authorized dealers can program remote
controls for your vehicle.
Note: Your vehicle keys came with a
security label that provides important key
cut information. Keep the label ...
Kia Cee'd JD Owners Manual: Speed Limit Information Function (SLIF)
The system displays the information of
speed limit and no passing restriction to
the driver in both the instrument cluster
and navigation screen. SLIF detects traffic
signs with camera system attached
behind the top of the windscreen.
The SLIF also utilizes the navigation
information ...
