Kia Cee'd: Cooling System / Radiator Repair procedures
| Removal and Installation |
| 1. |
Disconnect the battery negative terminal.
|
| 2. |
Remove the air cleaner assembly.
(Refer to Intake and exhaust system - "Air Cleaner")
|
| 3. |
Remove the battery tray.
(Refer to Engine Electrical System - "Battery")
|
| 4. |
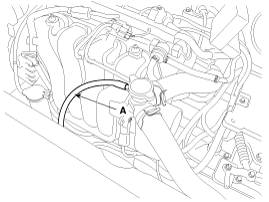
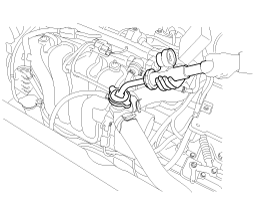
Disconnect the over flow hose (A) from the radiator.
|
| 5. |
Loosen the drain plug, and drain the engine coolant. Remove the radiator
cap to drain with speed.
|
| 6. |
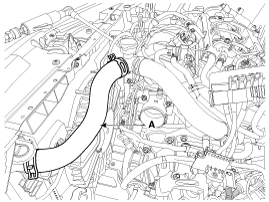
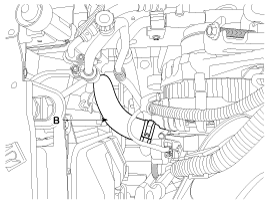
Disconnect the radiator upper hose (A) and lower hose (B).
|
| 7. |
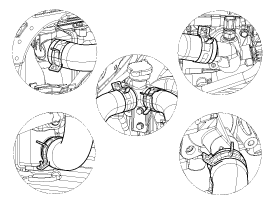
Disconnect the ATF cooler hoses.
|
| 8. |
Remove the front bumper.
(Refer to body - "Front Bumper Cover")
|
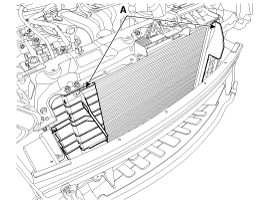
| 9. |
Remove the air guard (A).
|
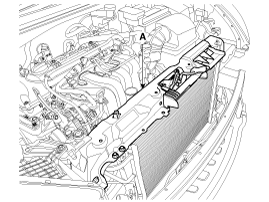
| 10. |
Remove the upper mounting bracket (A).
|
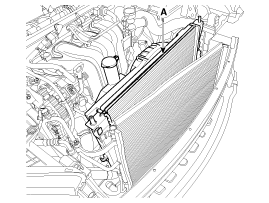
| 11. |
Separate the condenser from the radiator and then pull the radiator
(A) upper from vehicle.
|
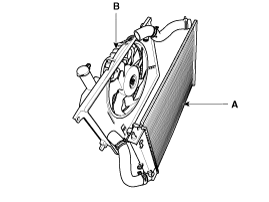
| 12. |
Remove the cooling fan & reservior tank (A) from the radiator (B).
|
| 13. |
Install in the reverse order of removal.
|
| 14. |
Fill the radiator with coolant and check for leaks.
|
| 15. |
Put the radiator cap on tightly, then run engine again and check for
leaks.
|
| Inspection |
| 1. |
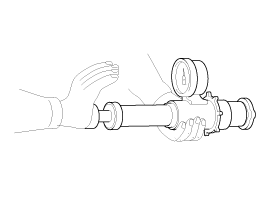
Remove the radiator cap, wet its seal with engine coolant, and then
install it on a pressure tester.
|
| 2. |
Apply a pressure of 93.16 ~ 122.58kpa (0.95 ~ 1.25kg/cm², 13.51 ~ 17.78psi).
|
| 3. |
Check for a drop in pressure.
|
| 4. |
If the pressure drops, replace the cap.
|
| 1. |
Wait until engine is cool, then carefully remove the radiator cap and
fill the radiator with engine coolant, then install a pressure tester
on it.
|
| 2. |
Apply a pressure of 93 ~ 123kPa (0.95 ~ 1.25kgf/cm², 14 ~ 19psi).
|
| 3. |
Inspect for engine coolant leaks and a drop in pressure.
|
| 4. |
If the pressure drops, check hoses, the radiator and the water pump
for leakage. If there is no leakage, inspect the heater core, the cylinder
block and the cylinder head.
|
| 5. |
Remove the tester and reinstall the radiator cap.
|
 Radiator Components and components location
Components
1. Radiator
2. Mounting insulator
3. Radiator upper mounting bracket
4. Radiator upper hose
5. Radiator lower hose
6. Filler neck a ...
 Cooling Fan Components and components location
Components
1. Cooling fan
2. Fan motor
3. Fan shroud
...
Other information:
Ford Escape 2020-2026 Owners Manual: Adaptive Cruise Control Limitations
Sensor Limitations
WARNING: On rare occasions,
detection issues can occur due to the
road infrastructures, for example bridges,
tunnels and safety barriers. In these
cases, the system may brake late or
unexpectedly. At all times, you are
responsible for controlling your vehicle,
supervising t ...
Kia Cee'd JD Service Manual: Cylinder Head Cover Repair procedures
Removal
1.
Remove the engine cover.
2.
Disconnect the battery negative terminal.
3.
Disconnect the intake OCV(Oil Control Valve)connector, exhaust OCV(Oil
Control Valve)connector, and then remove exha ...

