Kia Cee'd: Controller / Heater & A/C Control Unit (DATC) Repair procedures

Kia Cee'd JD Service Manual / Heating,Ventilation, Air Conditioning / Controller / Heater & A/C Control Unit (DATC) Repair procedures

Self Diagnosis
1.
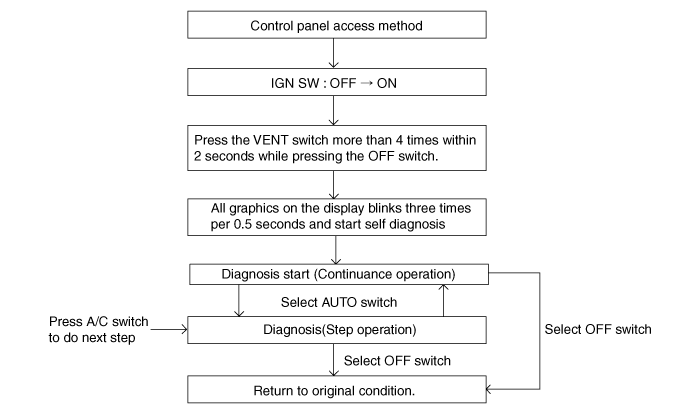
Self-diagnosis process

2.
How to read self-diagnostic code
After the display the panel blinks three times every 0.5 second, the corresponding fault code blinks on the setup temperature display panel every 0.5 second and will show two figures. Codes are displayed in numerical format
Fault codes are displayed in numerical format.
 
Display
Fail description
0
Normal
11
In-car sensor open
12
In-car sensor short
13
Ambient temperature sensor open
14
Ambient temperature sensor short
17
Evaporator temperature sensor open
18
Evaporator temperature sensor short
19
Temperature door potentiometer open/short (Driver)
20
Temperature door potentiometer fault (Driver)
21
Mode door potentiometer open/short
22
Mode door potentiometer fault
23
Auto defogging sensor open
24
Auto defogging sensor short
25
Intake door potentiometer open/short
26
Intake door potentiometer fault
32
Temperature door potentiometer open/short (Passenger)
33
Temperature door potentiometer fault (Passenger)
45
APT (A/C Pressure Transducer) CAN signal fault
47
RPM CAN signal fault
48
Vehicle speed CAN signal fault
49
Engine coolant temperature CAN signal fault
50
Cluster ionizer fault
51
Dent sensor vent open
52
Dent sensor vent short
53
Dent sensor floor open
54
Dent sensor floor short

3.
Fault code display
(1)
Continuance operation : None or one DTC code.

(2)
Continuance operation : Two or more DTC code.

(3)
STEP operation
A.
Normal or one fault code is same as a continuance operation.
B.
There are two or more DTC code.

4.
If fault codes are displayed when checking, inspect for malfunction causes by referring to fault codes table.
5.
Fail safe
(1)
In-car temperature sensor : Control with the value of 25°C(77°F)
(2)
Ambient temperature sensor : Control with the value of 20°C(67°F)
(3)
Evaporator temperature sensor : Control with the value of -2°C(28.4°F)
(4)
Water temperature sensor : Control with the value of -2°C(28.4°F)
(5)
Temperature control actuator (Air mix potentiometer) :
If temperature setting is 15°C~22.5°C(59°F~72.5°F), fix at maximum cooling position.
If temperature setting is 23°C~30°C(73.4°F~86°C), fix at maximum heating position.
(6)
Mode control actuator (Direction potentiometer) :
Fix vent position, while selecting vent mode.
Fix defrost position, while selecting all except vent mode.
(7)
Intake control actuator :
Fix fresh position, while selecting fresh mode.
Fix recirculation position, while selecting recirculation mode.
(8)
Auto defog sensor : Control with the value of 0%.
Replacement
  
When prying with a flat-tip screwdriver, wrap it with protective tape, and apply protective tape around the related parts, to prevent damage.
Put on gloves to protect your hands.
1.
Disconnect the negative (-) battery terminal.
2.
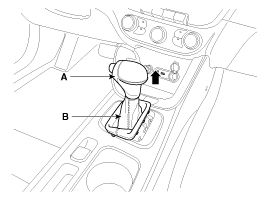
Remove the gear boots (B) and gear knob (A).

3.
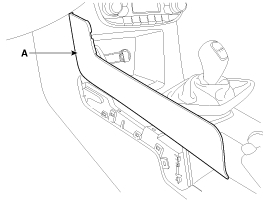
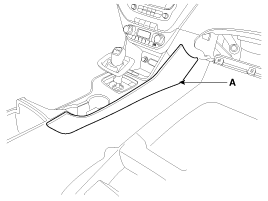
Using a screwdriver or remover, remove the console garnish (A).
[LH]

[RH]

4.
Using a screwdriver or remover, remove the console upper cover (A).

5.
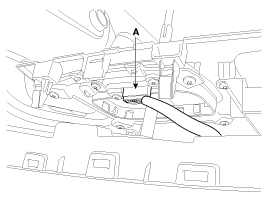
Disconnect the indicator connector (A).

6.
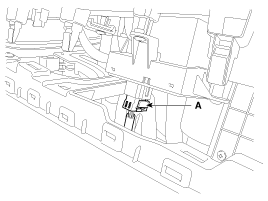
Disconnect the EPB switch connector (A).

7.
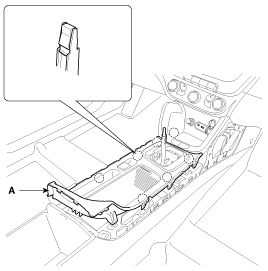
After loosening the mounting screws, then remove the console tray (A).

8.
Disconnect the connectors (A).

9.
Remove the crash pad lower panel.
(Refer to Body - "Crash Pad Lower Panel")
10.
Remove the glove box housing.
(Refer to Body - "Glove Box Housing")
11.
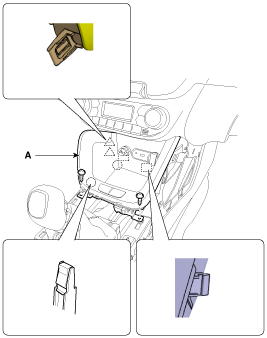
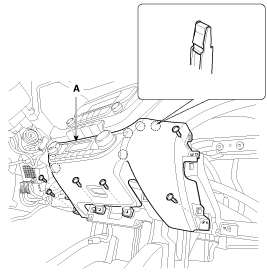
After loosening the mounting screws, then remove the crash pad center lower panel (A).

12.
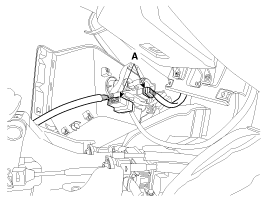
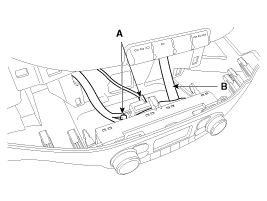
Disconnect the heater control unit connectors (A) and hose (B).

13.
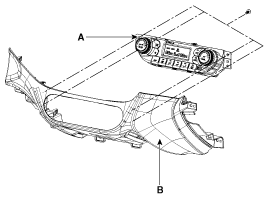
Remove the heater A/C controller (A) from the lower center facia panel (B) after loosening the mounting screws.

14.
Install in the reverse of removal.
  
Make sure the connector are connected in properly.
Replace any damaged clips.
Heater & A/C Control Unit (DATC) Components and components location
Components Gasline Connector Pin Function   Connector  Pin No. Function Connector  Pin No.  ...

Other information:

Kia Cee'd JD Service Manual: Overhead Console Lamp Repair procedures
Inspection 1. Remove the overhead console lamp assembly then check for continuity between terminals. If the continuity is not as specified, replace the map lamp switch. [Non-Sunroof Type]   No. ...

Kia Cee'd JD Service Manual: Specifications
Specifications   SPAS unit Power IGN1 Operating voltage 9V ~ 16V SPAS sensor (Front/Rear) Number of sensors 4EA (Front), 4EA (Rear) Operation voltage ...

© 2017-2024 www.kceed.com