Kia Cee'd: For 15, 16 inch tire / Using the Tire Mobility Kit
CAUTION
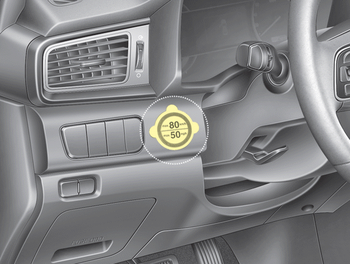
Detach the speed restriction label (0) from the sealant bottle (1), and place it in a highly visible place inside the vehicle such as on the steering wheel to remind the driver not to drive too fast.
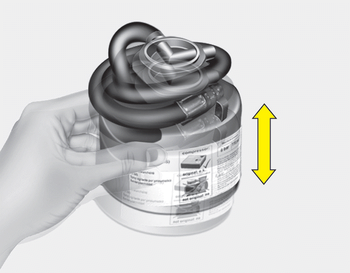
1. Shake the sealant bottle.
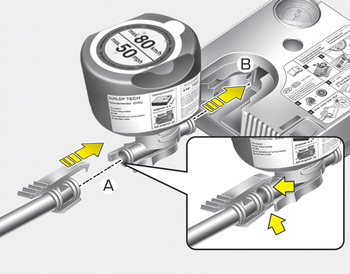
2. Screw the filling hose (2) onto the connector of the sealant bottle (1).
3. Insert the sealant bottle into the housing of the compressor (4) so that the bottle is upright.
4. Ensure that the button (9) on the compressor is not pressed.
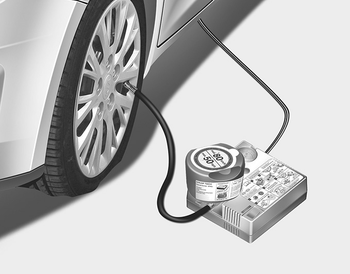
5. Unscrew the valve cap from the valve of the defective wheel and screw the filling hose (2) of the sealant bottle onto the valve.
6. Ensure that the compressor is switched off, position 0.
CAUTION
Securely install the sealant filling hose to the valve. If not, sealant may flow backward, possibly clogging the filling hose.

7. Plug the compressor power cord into the vehicle power outlet.
✽ NOTICE
Only use the front passenger side power outlet when connecting the power cord.
8. With the ignition switch in the ON position, switch on the compressor and let it run for approximately 5~7 minutes to fill the sealant up to proper pressure. (refer to the Tire and Wheels, chapter 8). The inflation pressure of the tire after filling is unimportant and will be checked/corrected later.
Be careful not to overinflate the tire and stay away from the tire when filling it.
CAUTION - Tire pressure
Do not attempt to drive your vehicle if the tire pressure is below 200 kPa (29 psi). This could result in an accident due to sudden tire failure.
9. Switch off the compressor.
10. Detach the hoses from the sealant bottle connector and from the tire valve.
Return the Tire Mobility Kit to its storage location in the vehicle.
WARNING - Carbon monoxide
Do not leave your vehicle running in a poorly ventilated area for extended periods of time. Carbon monoxide poisoning and suffocation can occur.
Distributing the sealant
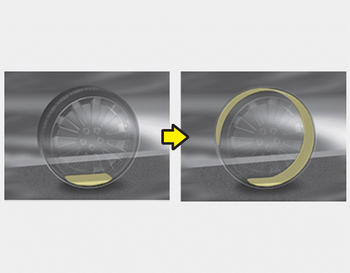
11. Immediately drive approximately 7~10 km (4~6 miles or, about 10min) to evenly distribute the sealant in the tire.
Do not exceed a speed of 80 km/h (50 mph). If possible, do not fall below a speed of 20 km/h (12 mph).
While driving, if you experience any unusual vibration, ride disturbance or noise, reduce your speed and drive with caution until you can safely pull off of the side of the road.
Call for road side service or towing. When you use the Tire Mobility Kit, the tire pressure sensors and wheel may be damaged by sealant, remove the sealant stained with tire pressure sensors and wheel and inspect in authorized dealer.
 Components of the Tire Mobility Kit
1. Speed restriction label
2. Sealant bottle and label with
speed restriction
3. Filling hose from sealant bottle to
wheel
4. Connectors and cable for the battery
direct connection
5. Hold ...
 Checking the tire inflation pressure
1. After driving approximately 7~10
km (4~6 miles or about 10 min),
stop at a safety location.
2. Connect the filling hose (2) of the
compressor directly to the tire
valve.
3. Plug the com ...
Other information:
Kia Cee'd JD Owners Manual: Steering-wheel mount controls
(1) : Mutes the microphone during
a call.
(2) ,
: Used to control volume.
(3) (If equipped)
When pressed shortly (under 0.8
seconds)
- Starts voice recognition
- When selecting during a voice
prompt, stops the prompt and converts
to voice command waiting
state
When pressed and hel ...
Kia Cee'd JD Owners Manual: Daytime running light
Daytime Running Lights (DRL) can make
it easier for others to see the front of your
vehicle during the day. DRL can be helpful
in many different driving conditions,
and it is especially helpful after dawn and
before sunset.
The DRL system will turn off when:
Type A
When headlight (Lo ...
