
Kia Cee'd: Clutch Cover And Disc / Repair procedures
| Removal |
| 1. |
Remove the transaxle assembly.
G 1.6 MPI (Refer to Manual Transaxle System - " Manual Transaxle")
G 1.4 MPI (Refer to Manual Transaxle System - " Manual Transaxle")
D 1.6 TCI-U2 (Refer to Manual Transaxle System - " Manual Transaxle")
D 1.4 TCI-U2 (Refer to Manual Transaxle System - " Manual Transaxle")
G 1.6 GDI (Refer to Manual Transaxle System - " Manual Transaxle")
G 1.6 T-GDI (Refer to Manual Transaxle System - " Manual Transaxle")
|
| 2. |
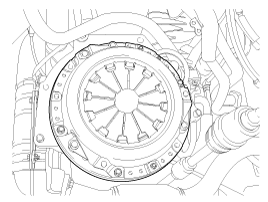
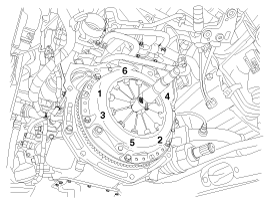
Remove the clutch cover bolts. Be careful not to be bent or twist bolts.
Loosen bolts in diagonal directions.
|
| Inspection |
| 1. |
Inspect diaphragm spring wear which is in contact with a concentric
slave cylinder bearing.
|
| 2. |
Check the clutch cover and disc surface for wear or cracks.
|
| 3. |
Check the clutch disc lining for slipping or oil marks.
|
| 4. |
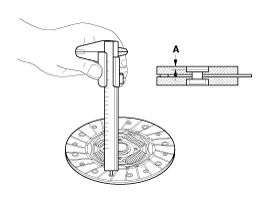
Measure the depth from a clutch lining surface to a rivet. If the measured
value is less than the specification below, replace it.
|
| Installation |
If reinstalling used cover, the cover should be installed with its clutch
disc as a set.
|

| 1. |
Apply grease on a disc spline part and transaxle input shaft spline
part as required.
|

| 2. |
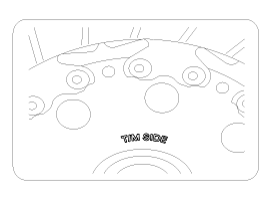
The 'T/M SIDE' marked surface should face the transaxle.
|
| 3. |
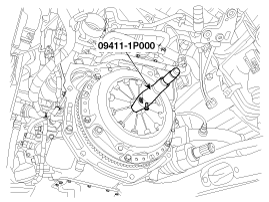
Install the clutch disc and the cover with SST (A: 09411-1P000).
|
| 4. |
Install the clutch cover bolts. Not to be bent or twisted, Tighten them
in diagonal directions.
|
| 5. |
Install the transaxle assembly.
G 1.6 MPI (Refer to Manual Transaxle System - " Manual Transaxle")
G 1.4 MPI (Refer to Manual Transaxle System - " Manual Transaxle")
D 1.6 TCI-U2 (Refer to Manual Transaxle System - " Manual Transaxle")
D 1.4 TCI-U2 (Refer to Manual Transaxle System - " Manual Transaxle")
G 1.6 GDI (Refer to Manual Transaxle System - " Manual Transaxle")
G 1.6 T-GDI (Refer to Manual Transaxle System - " Manual Transaxle")
|
 Components and components location
Components
1. Clutch release fork
2. Clutch cover assembly
3. Clutch disk assembly
4. Clutch release bearing
...
 Clutch Switch
...
Other information:
Kia Cee'd JD Owners Manual: Barrier net (wagon)
Your vehicle is equipped with a barrier net.
When you load some cargoes on the rear
seat or rear cargo area, you must install
the barrier net behind front seatback or
rear seatback.
It is designed to help protect the heads of
the occupants by obstructing objects flying
forward in front ...
Kia Cee'd JD Service Manual: Electronic Parking Brake (EPB) Description and operation
Description
The EPB is an electronic parking brake.
The EPB is different from existing parking systems which operated with the brake
pedal or the lever type. The EPB system sends the signal to the ECU when a driver
operates the EPB switch. The ECU operates the EPB actuato ...
